Watch the Tutorial Video
Whether for pre-surgery replication or unilateral reconstruction, taking a precise mold is the first step toward creating a signature prosthesis tailored to your body.
Follow along with our simple video tutorial to learn exactly how to capture your unique shape with confidence, accuracy, and precision.
Step-by-Step Guide
From preparation to packaging, follow each step carefully to make sure your areola impression is accurate, easy to do, and ready for prosthetic creation.

Step0
Help Makes It Easier
Before you begin, know that the entire mold process can be done by yourself.
Still, having a trusted person nearby to assist during application — if you’re comfortable — can help things go more smoothly.
Do what feels right for you. Your comfort comes first.
Step1
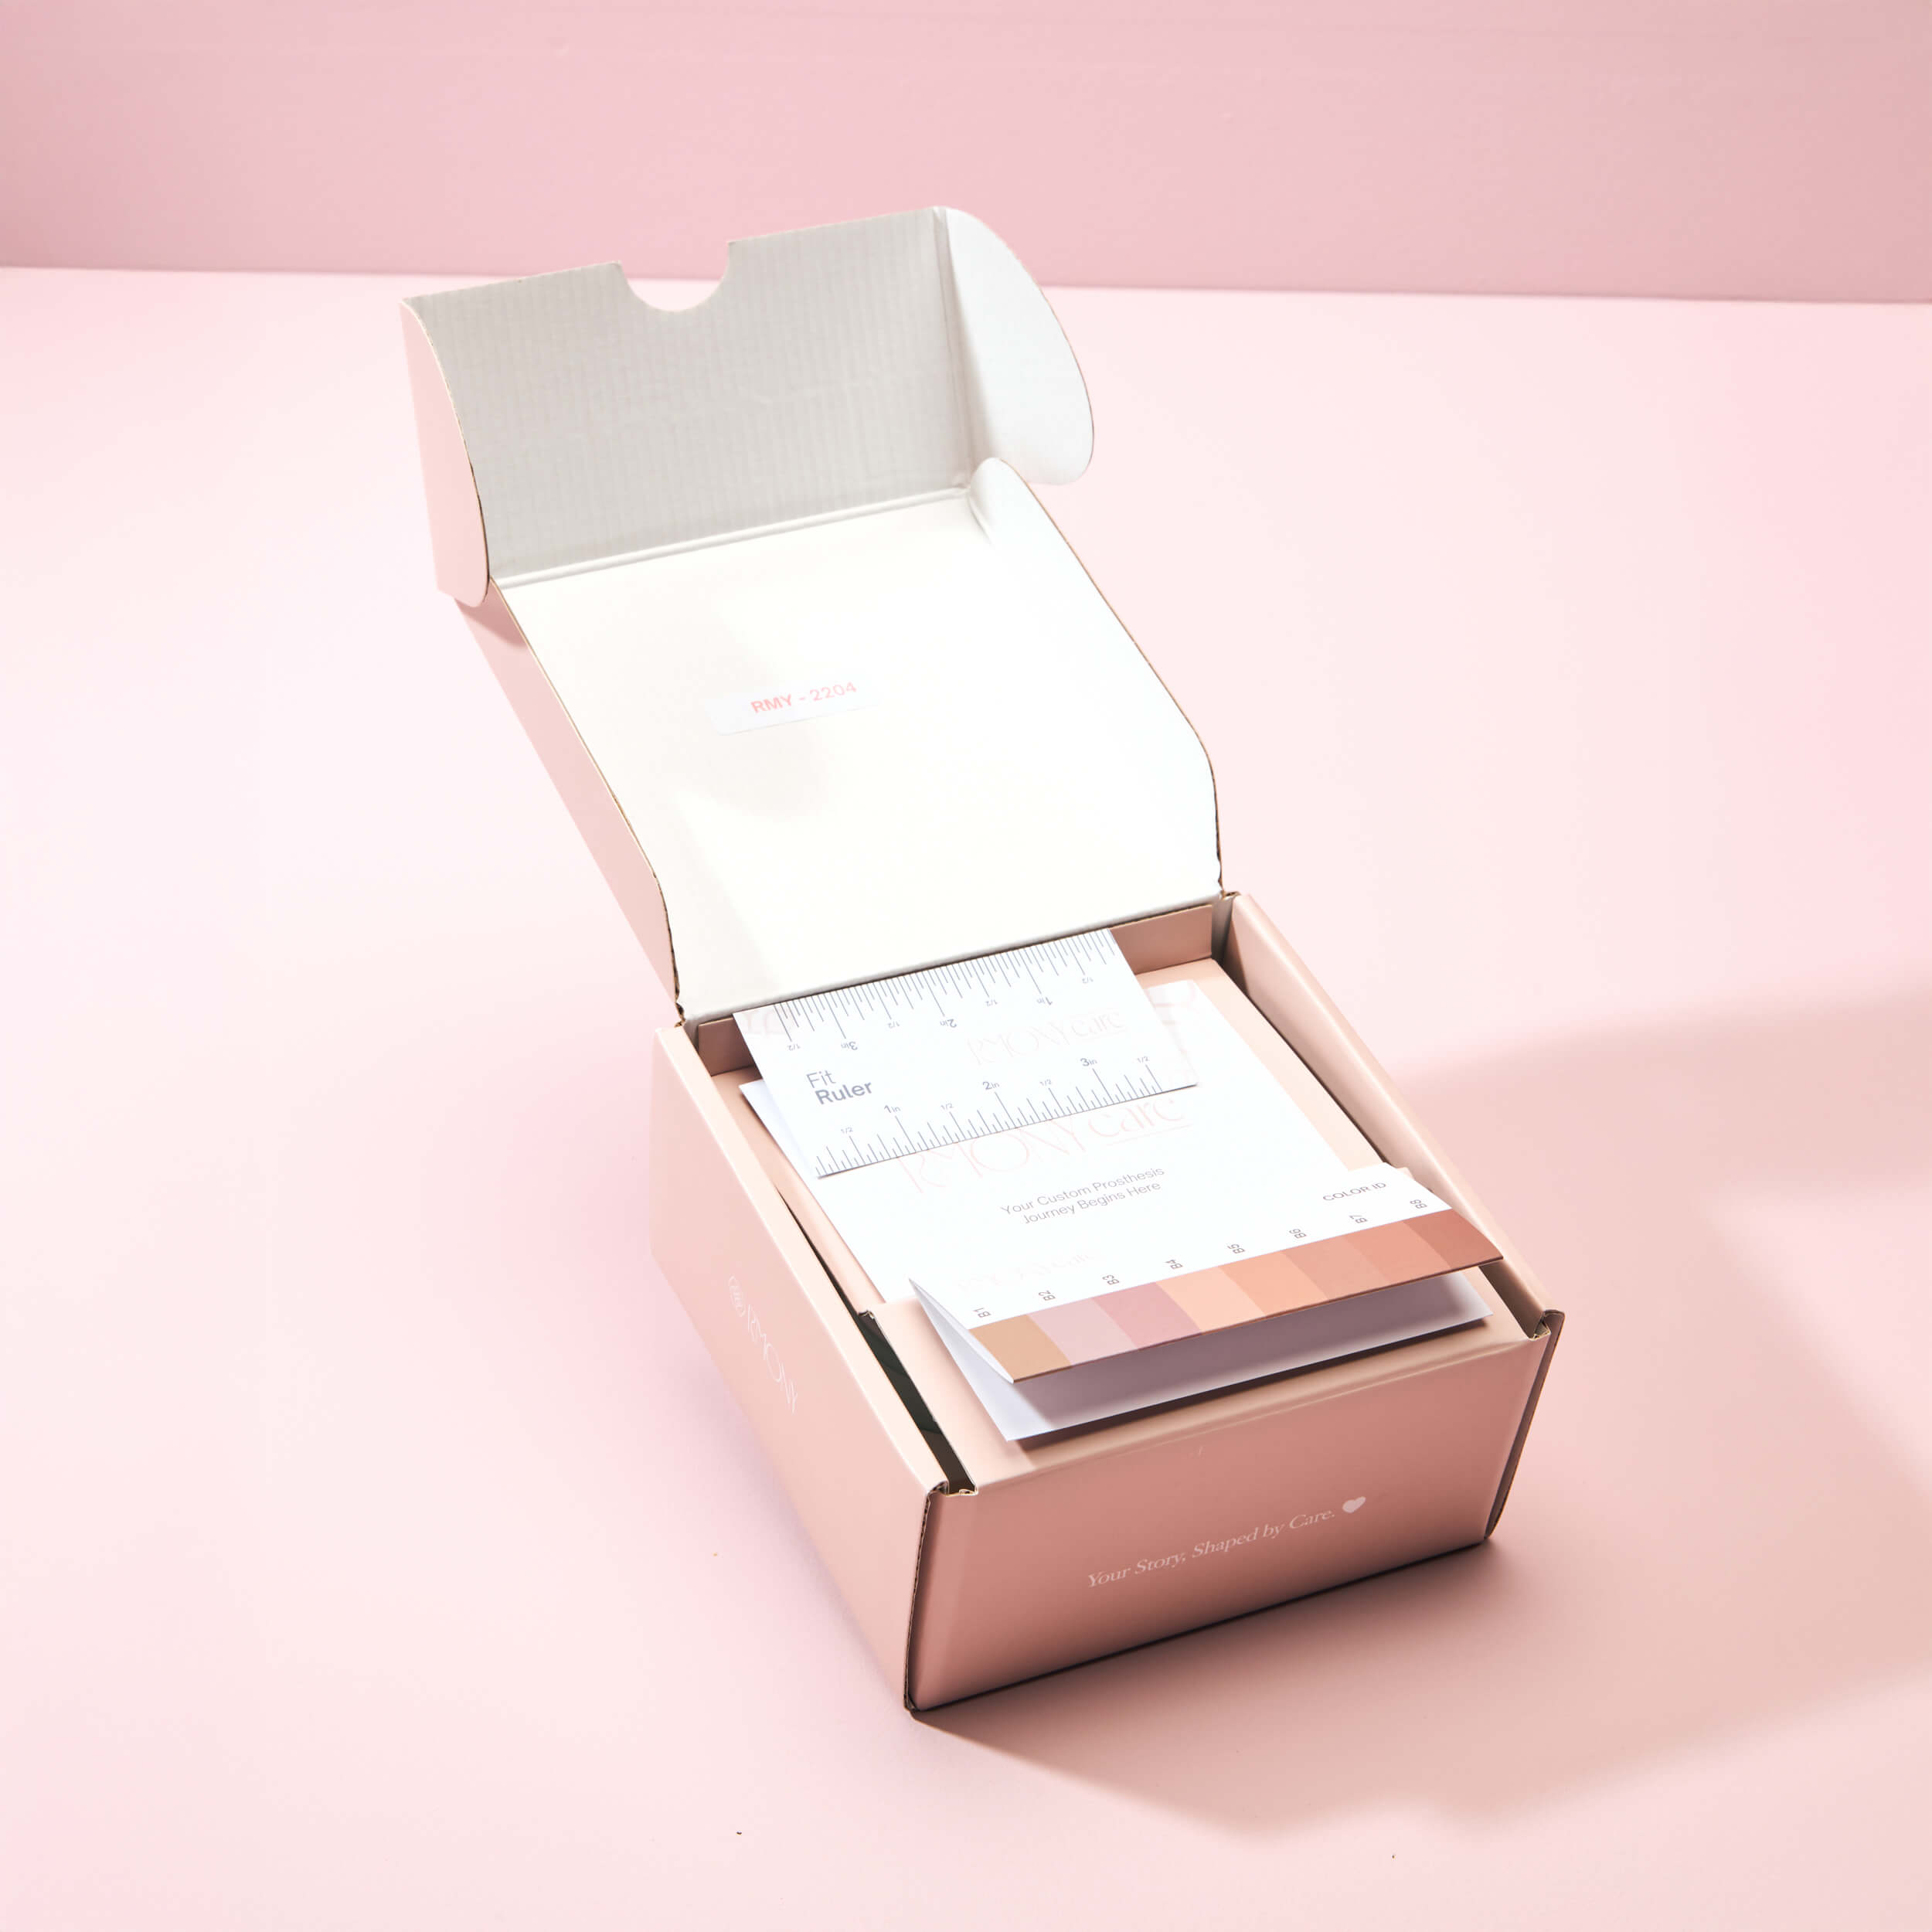
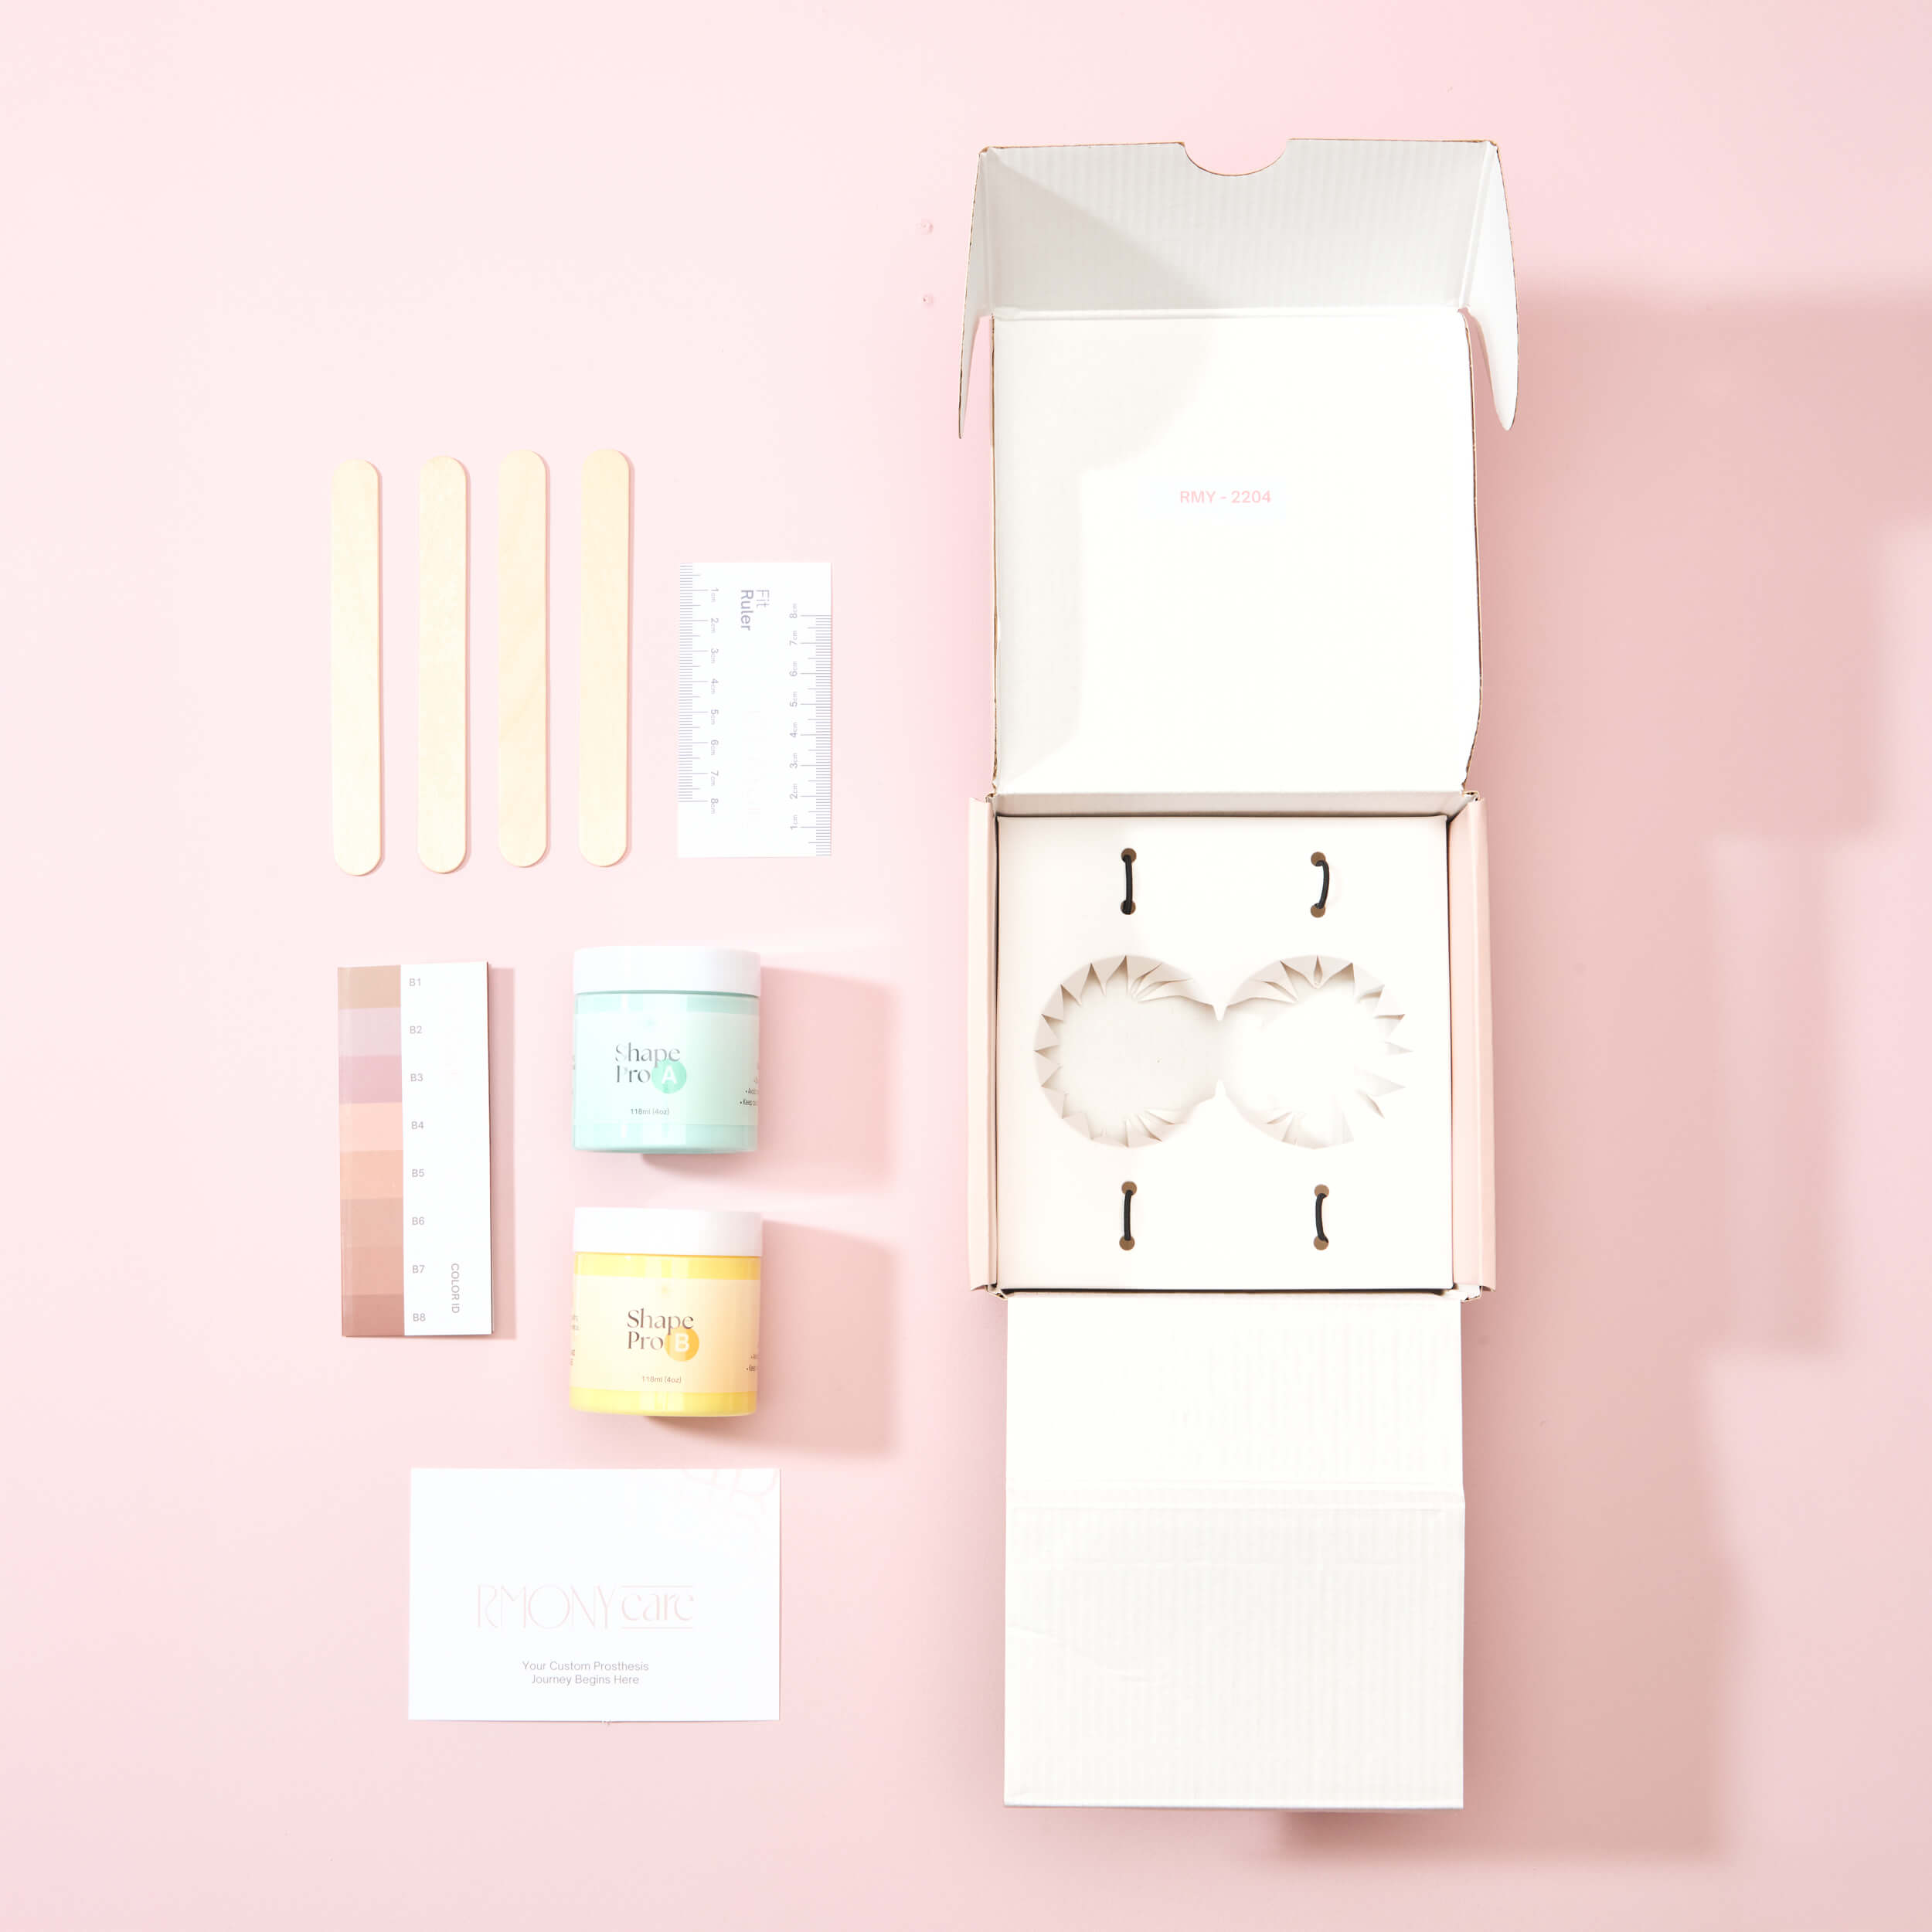
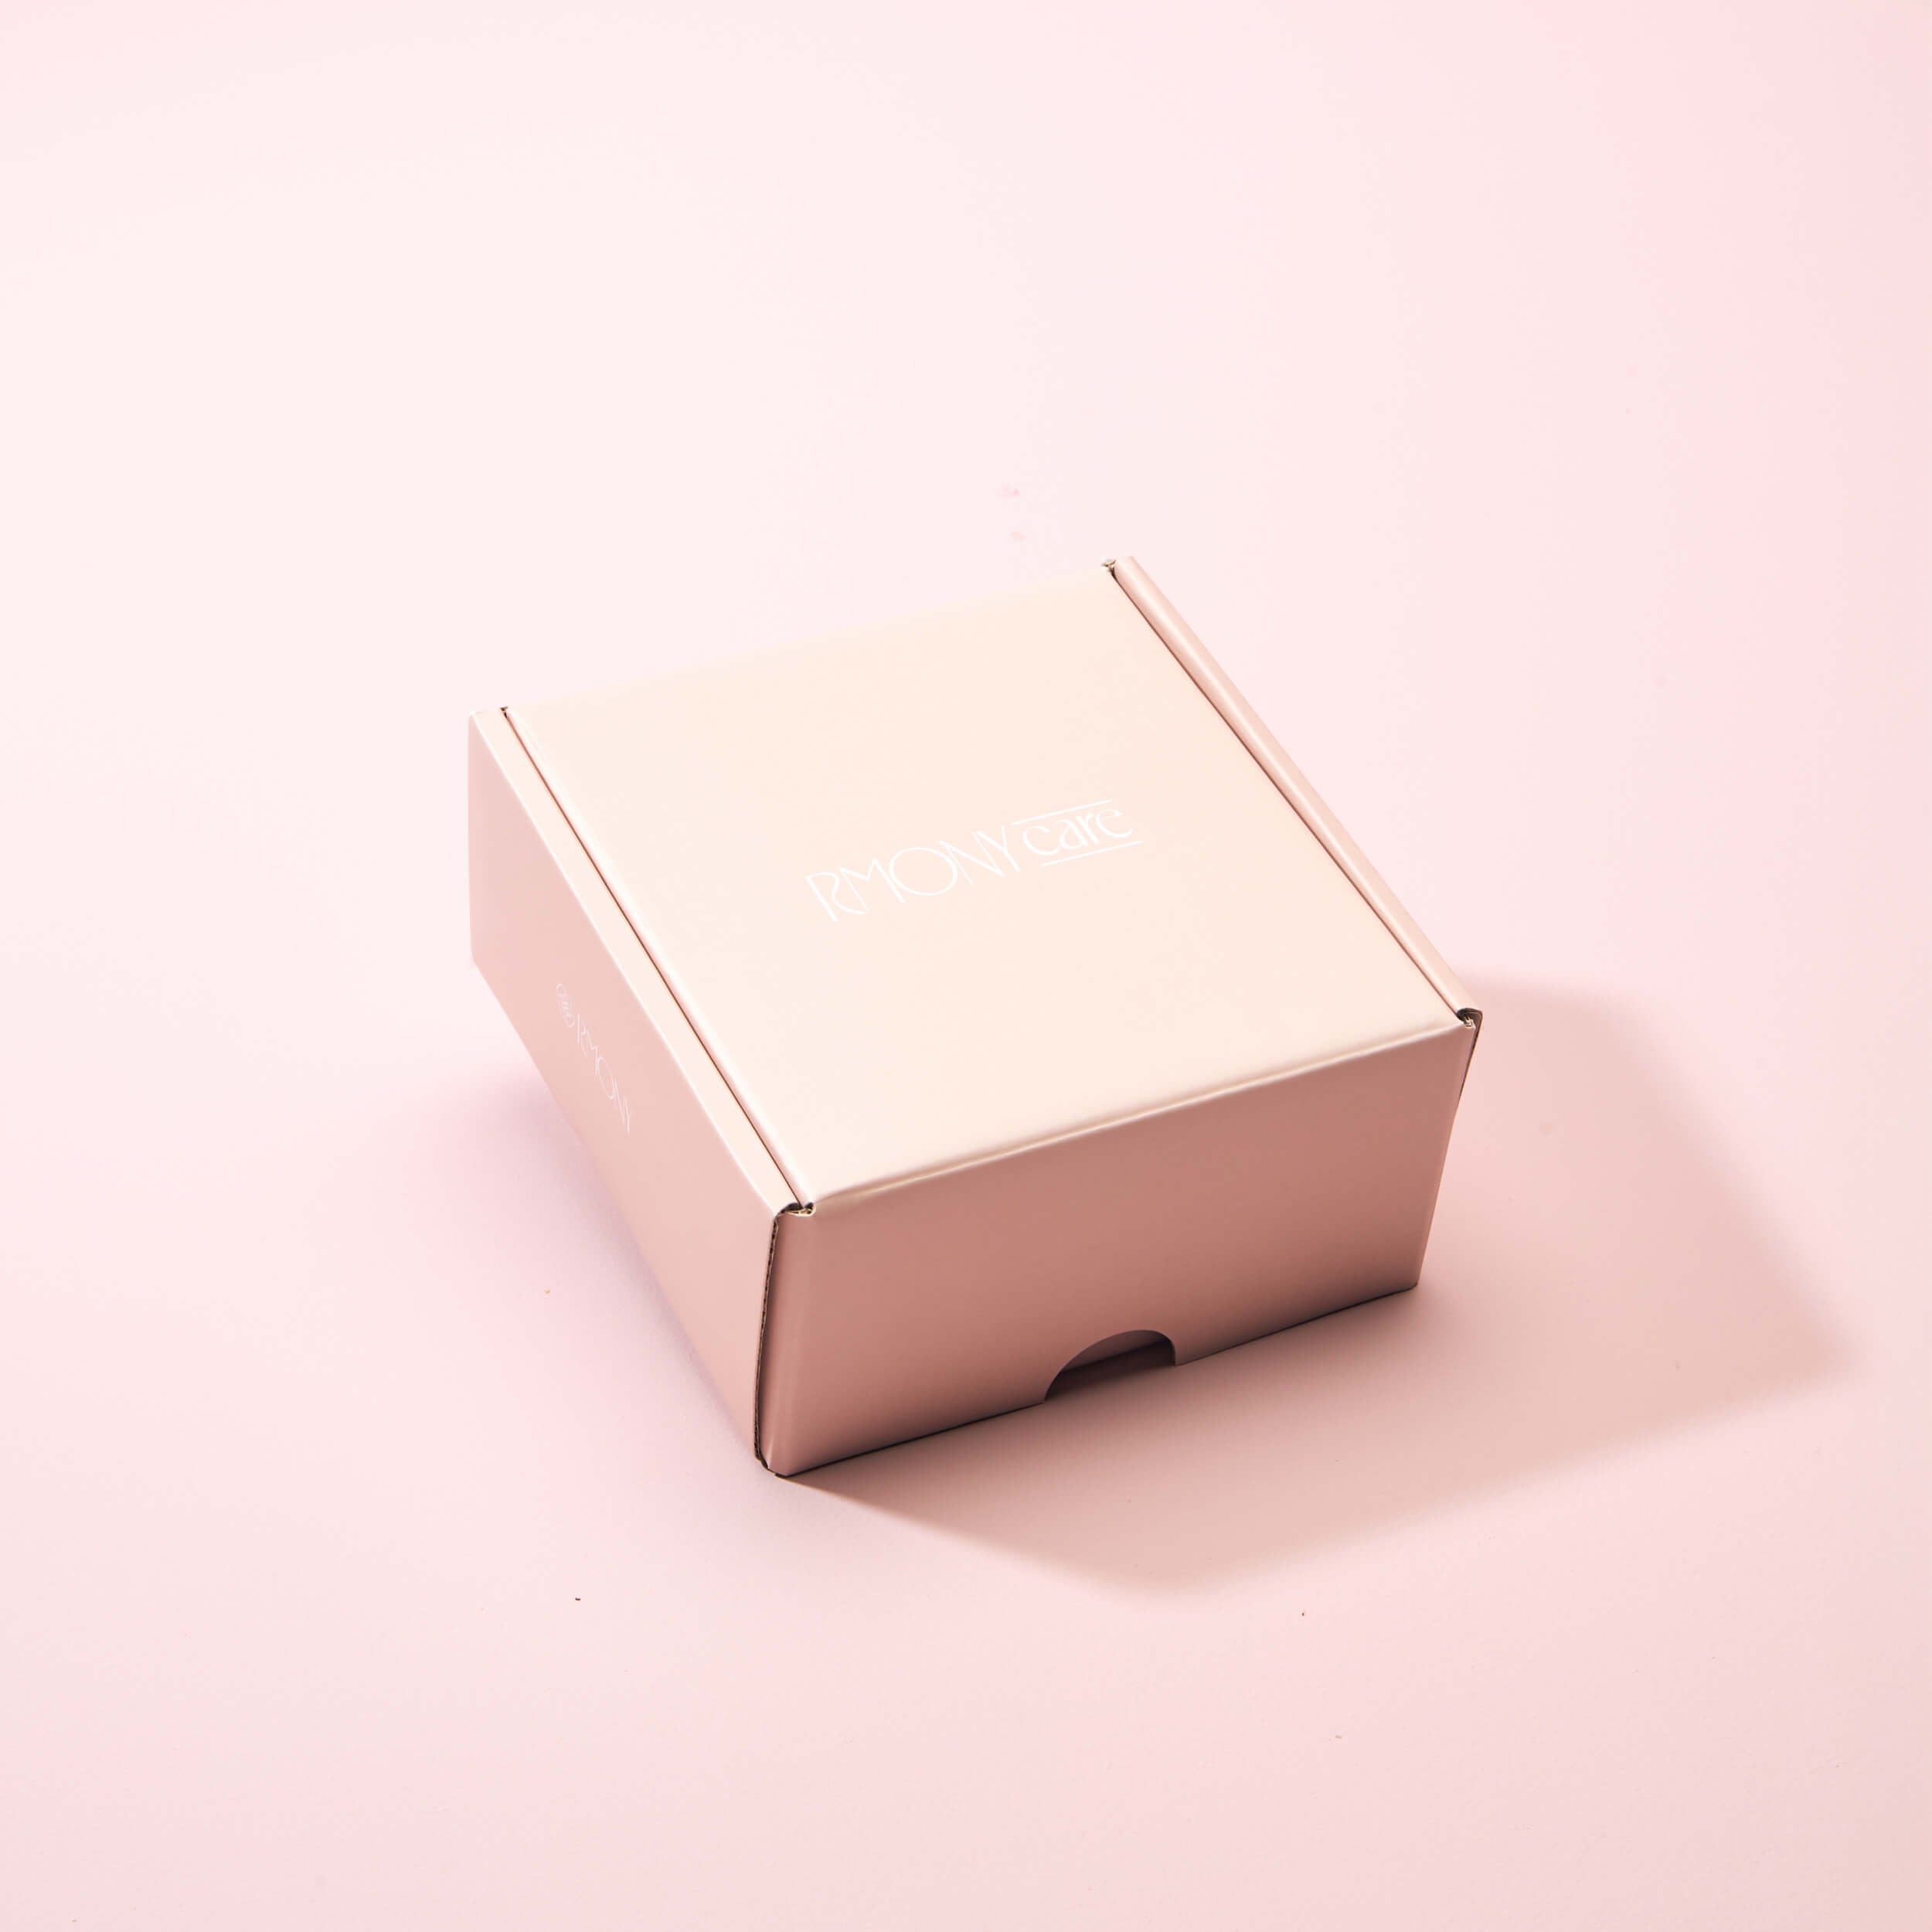
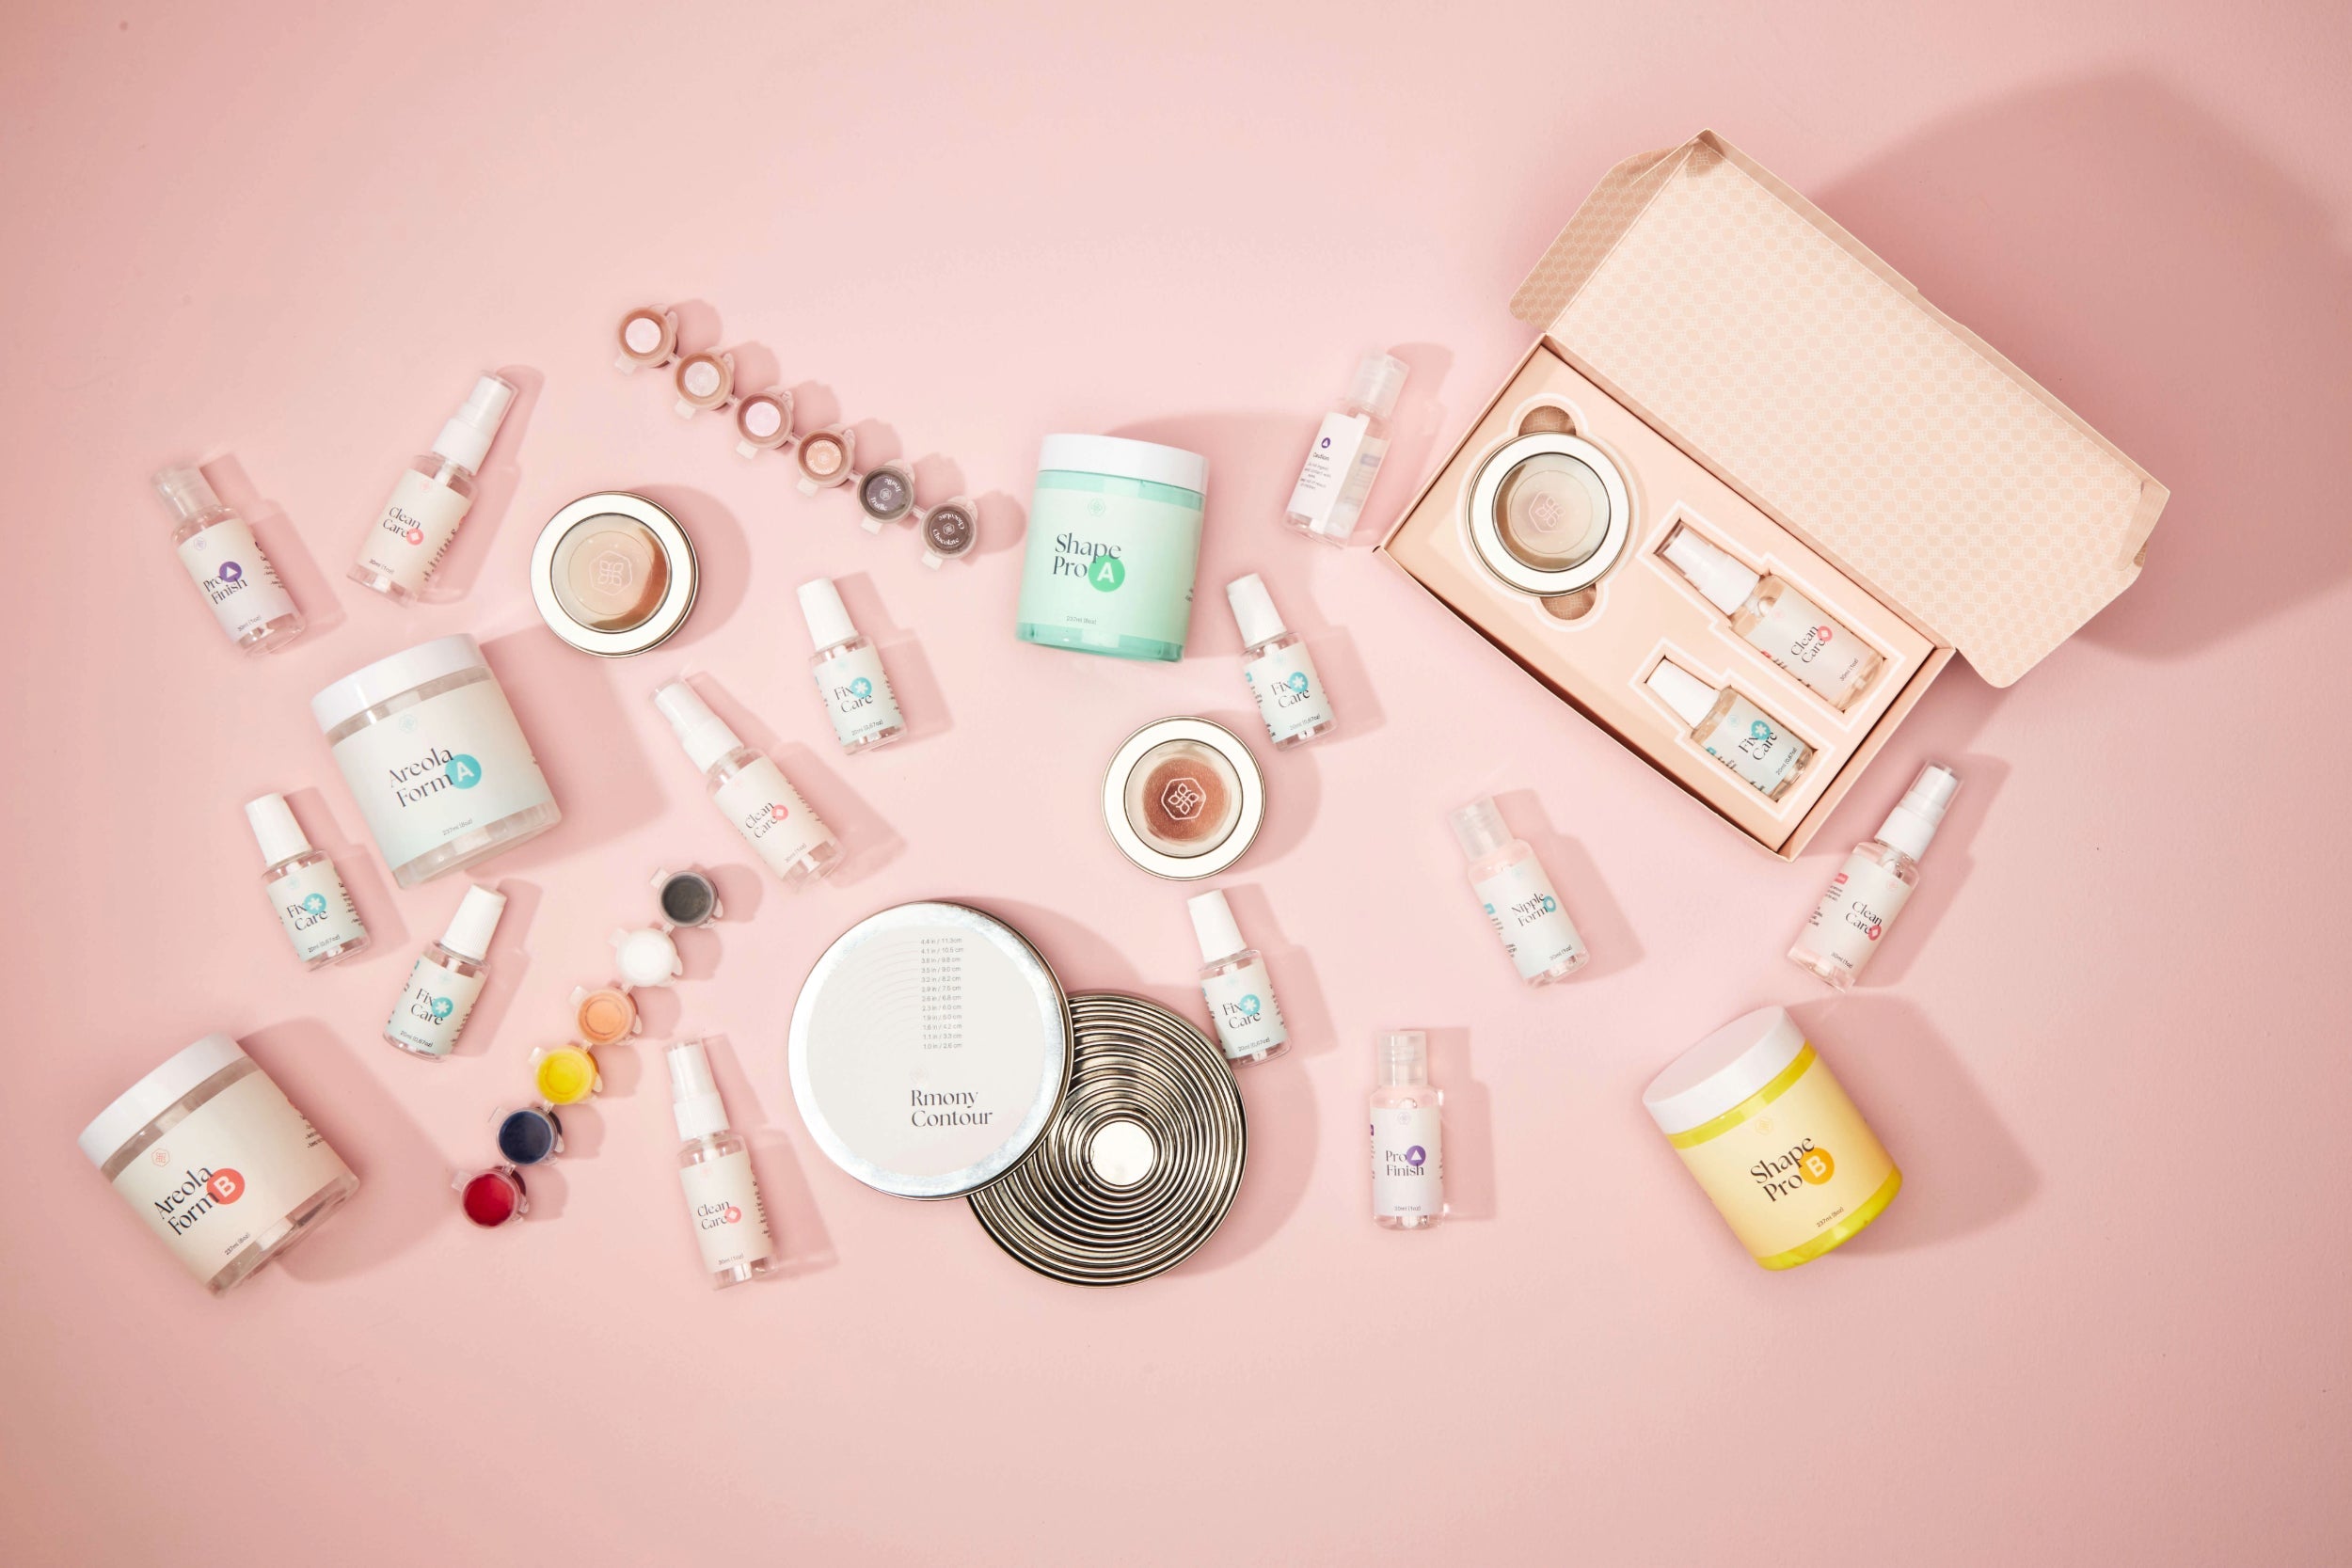
Open and Check Your Kit
Gently open the box without damaging it, as it will be used to return your mold later. Make sure you received all the items:
• 2 containers – Shape Pro A and Shape Pro B
• 4 wooden spatulas
• 1 Fit Ruler
• 1 ID Color (with color references for accurate tone selection)
• Instruction Card
Step2
Prepare Your Materials
Take all items out of the box and organize them in a clean area before starting.
Store Shape Pro A and B at 22–24°C (72–75°F) for at least 4 hours before use.
Proper temperature improves material quality and prevents unwanted texture changes.
Step3
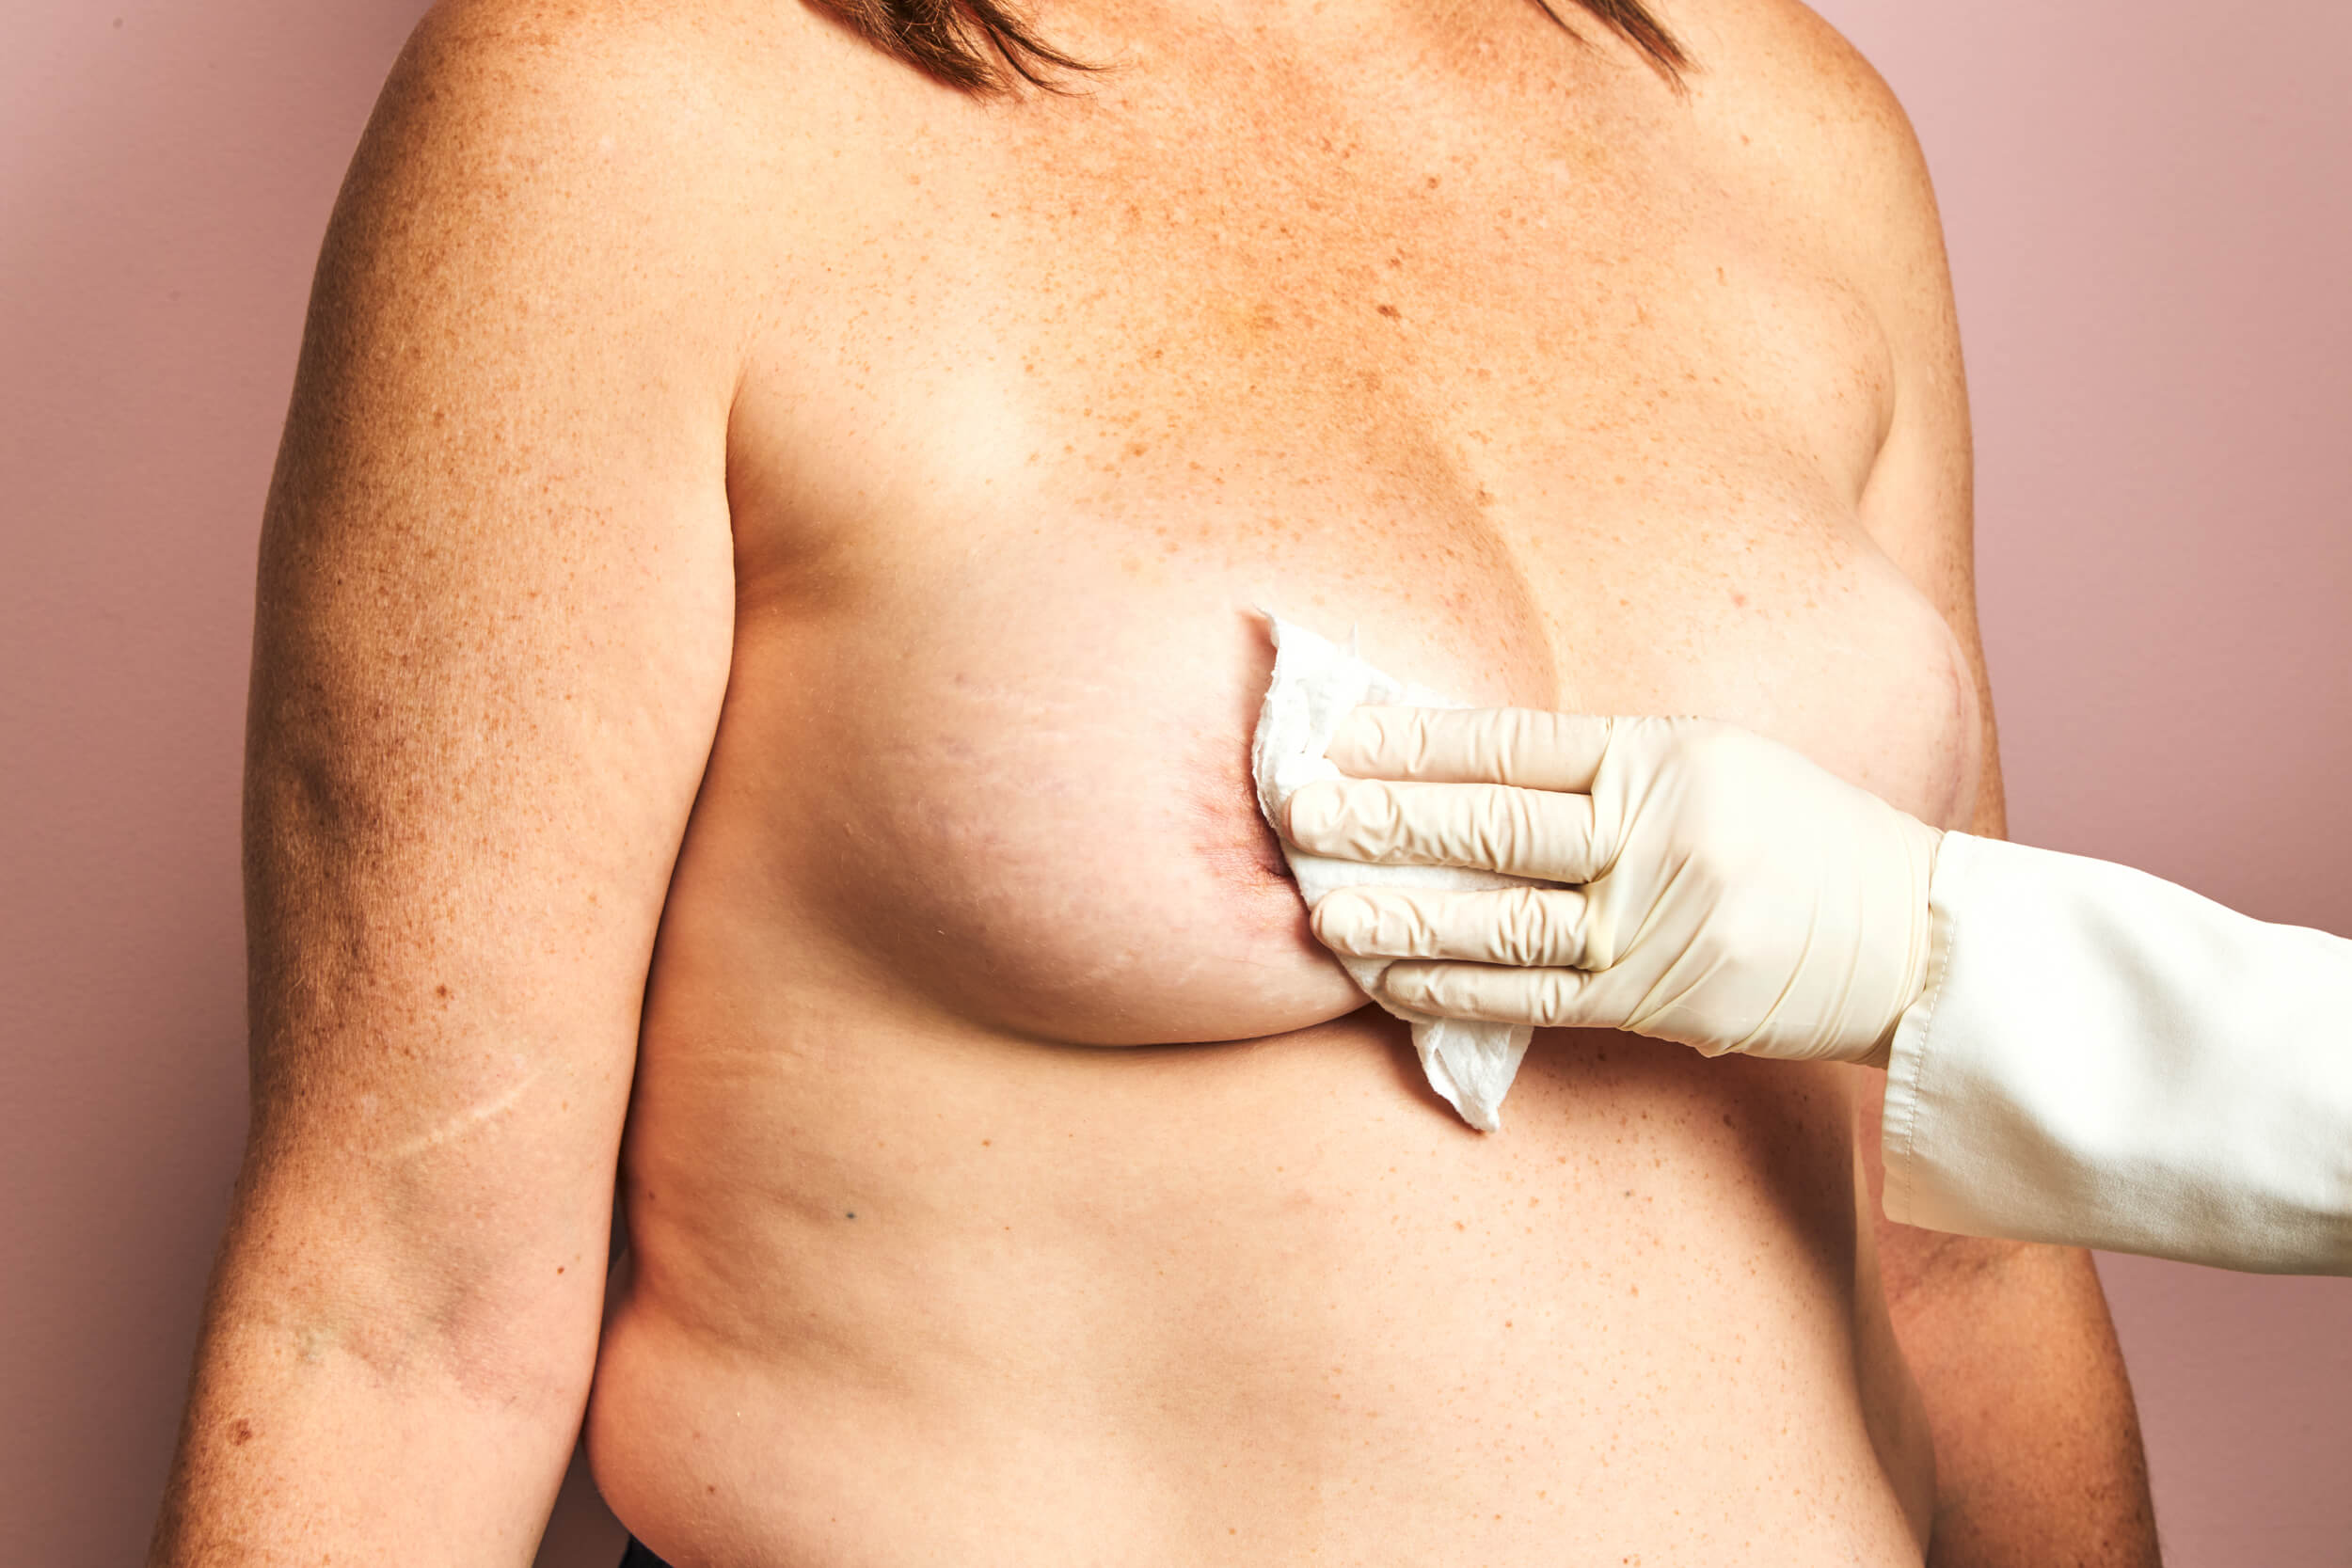
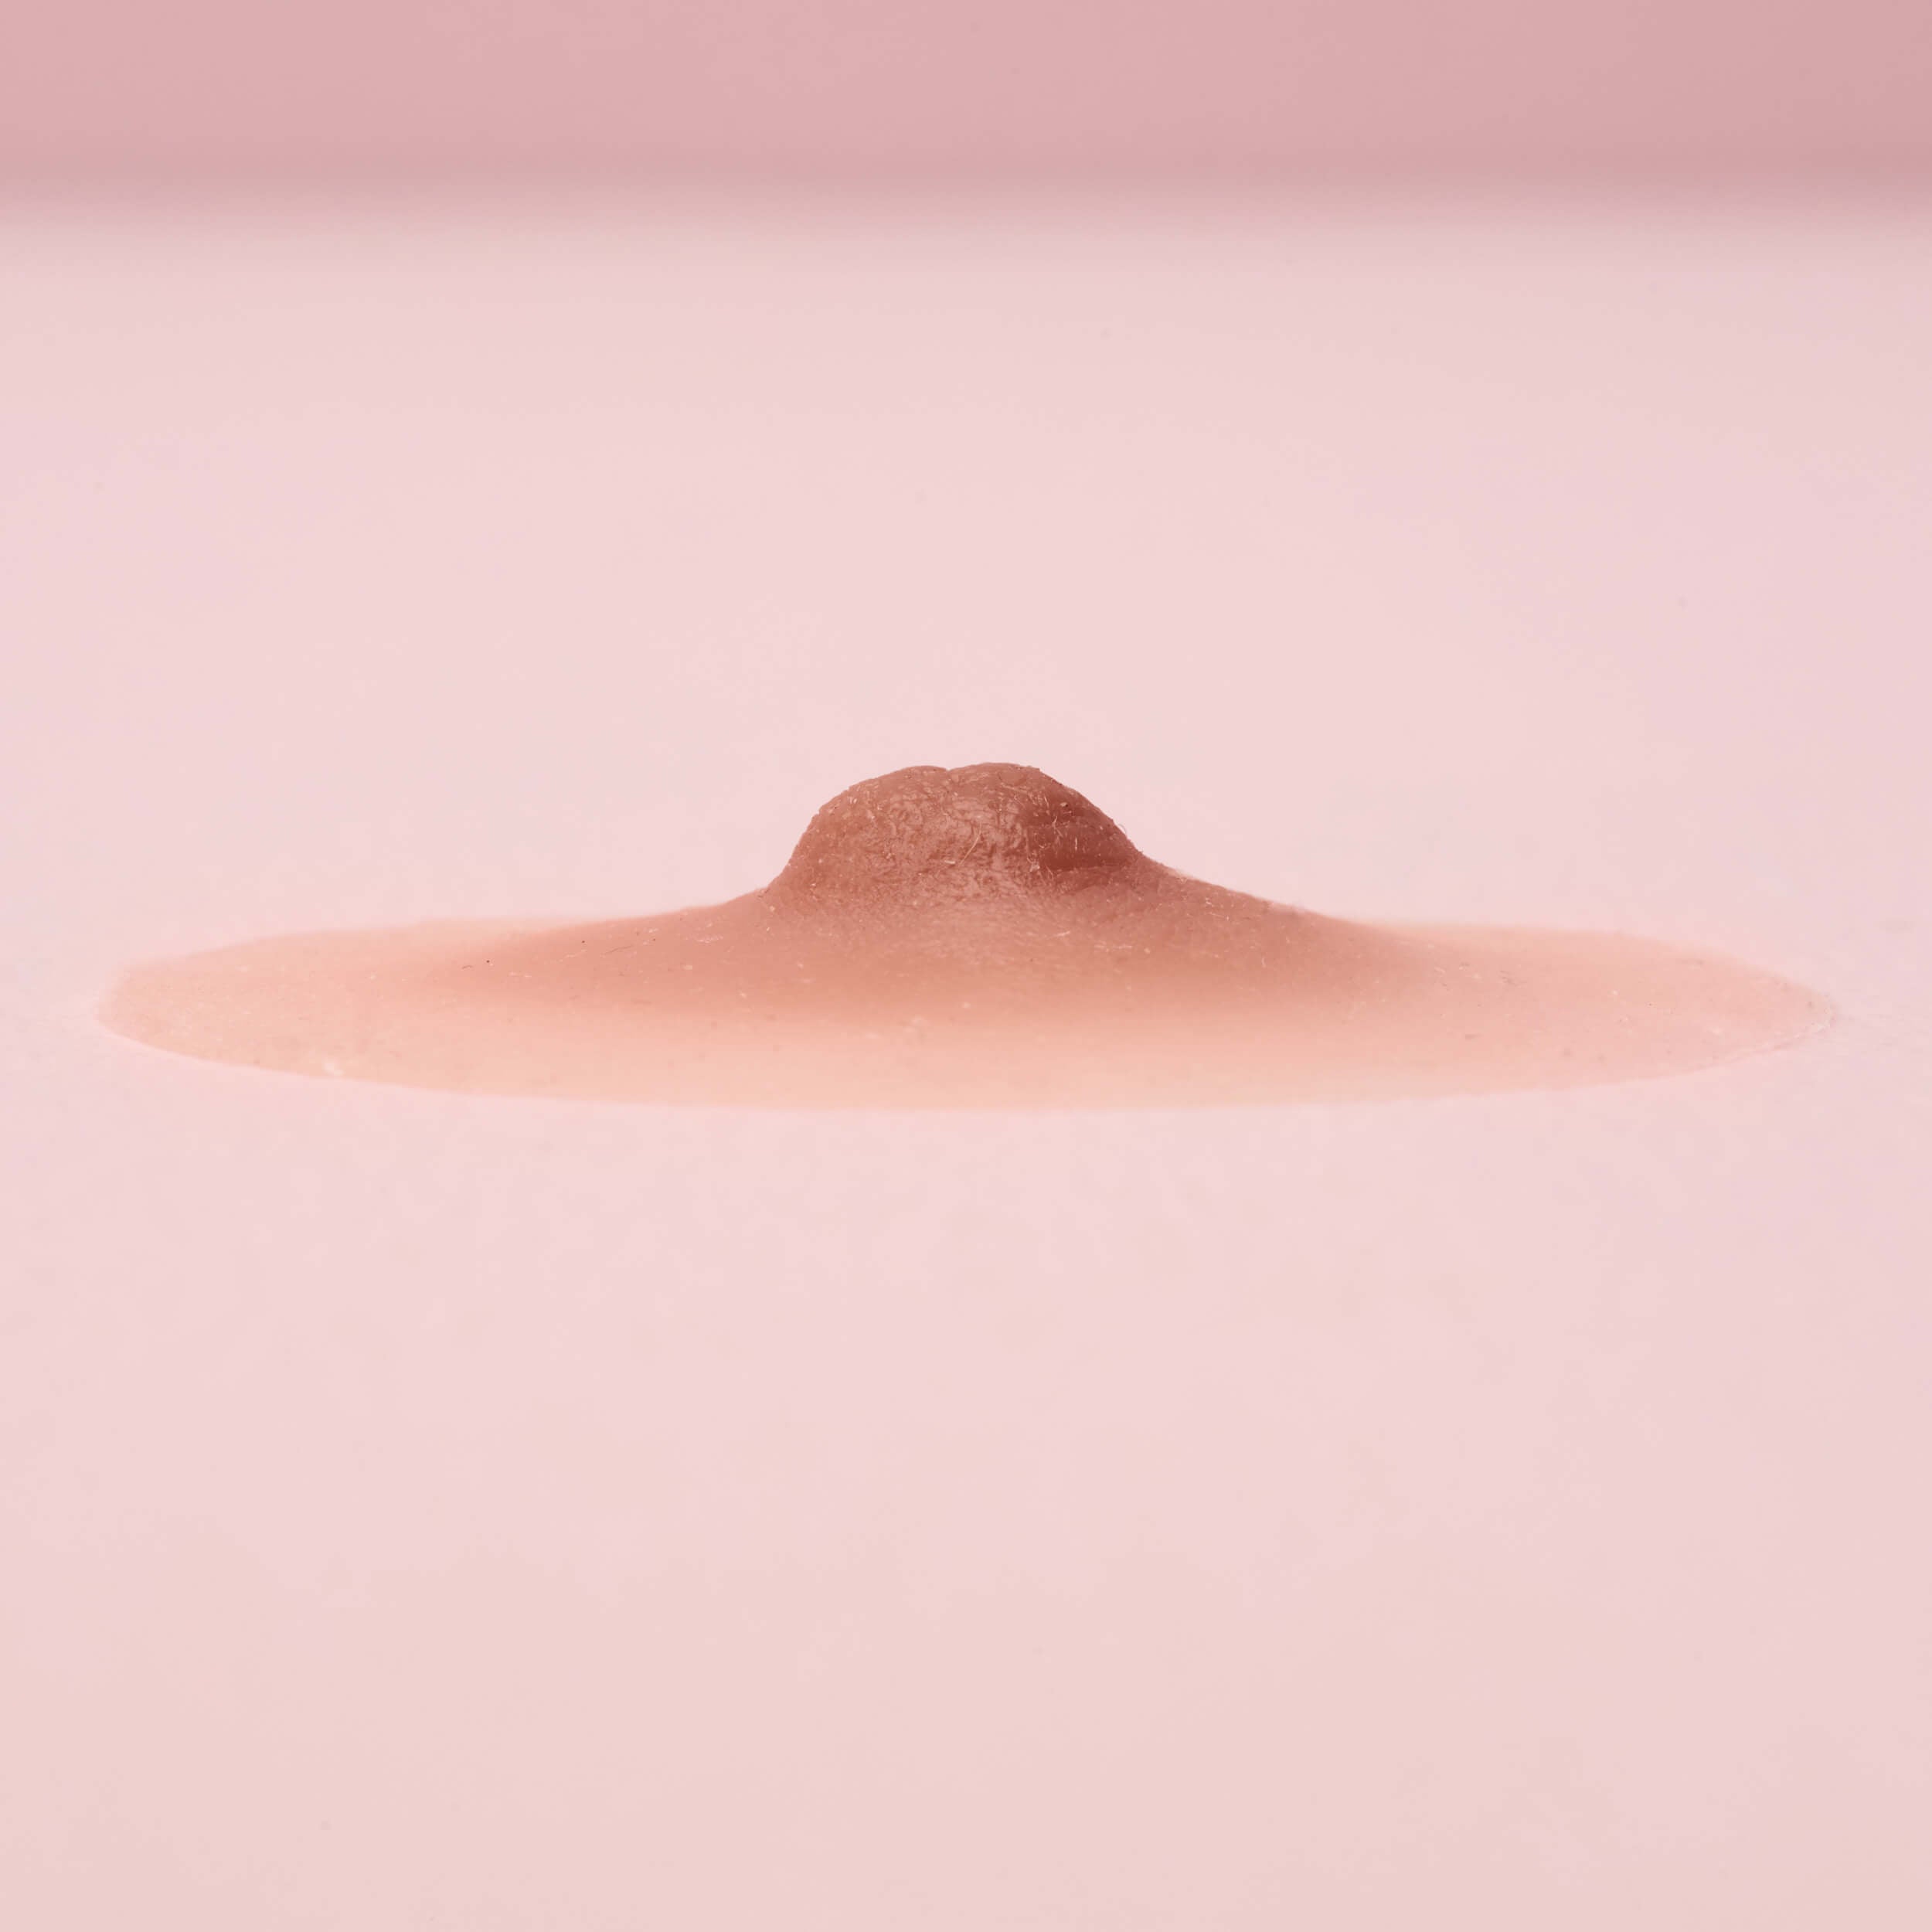
Clean & Warm the Area
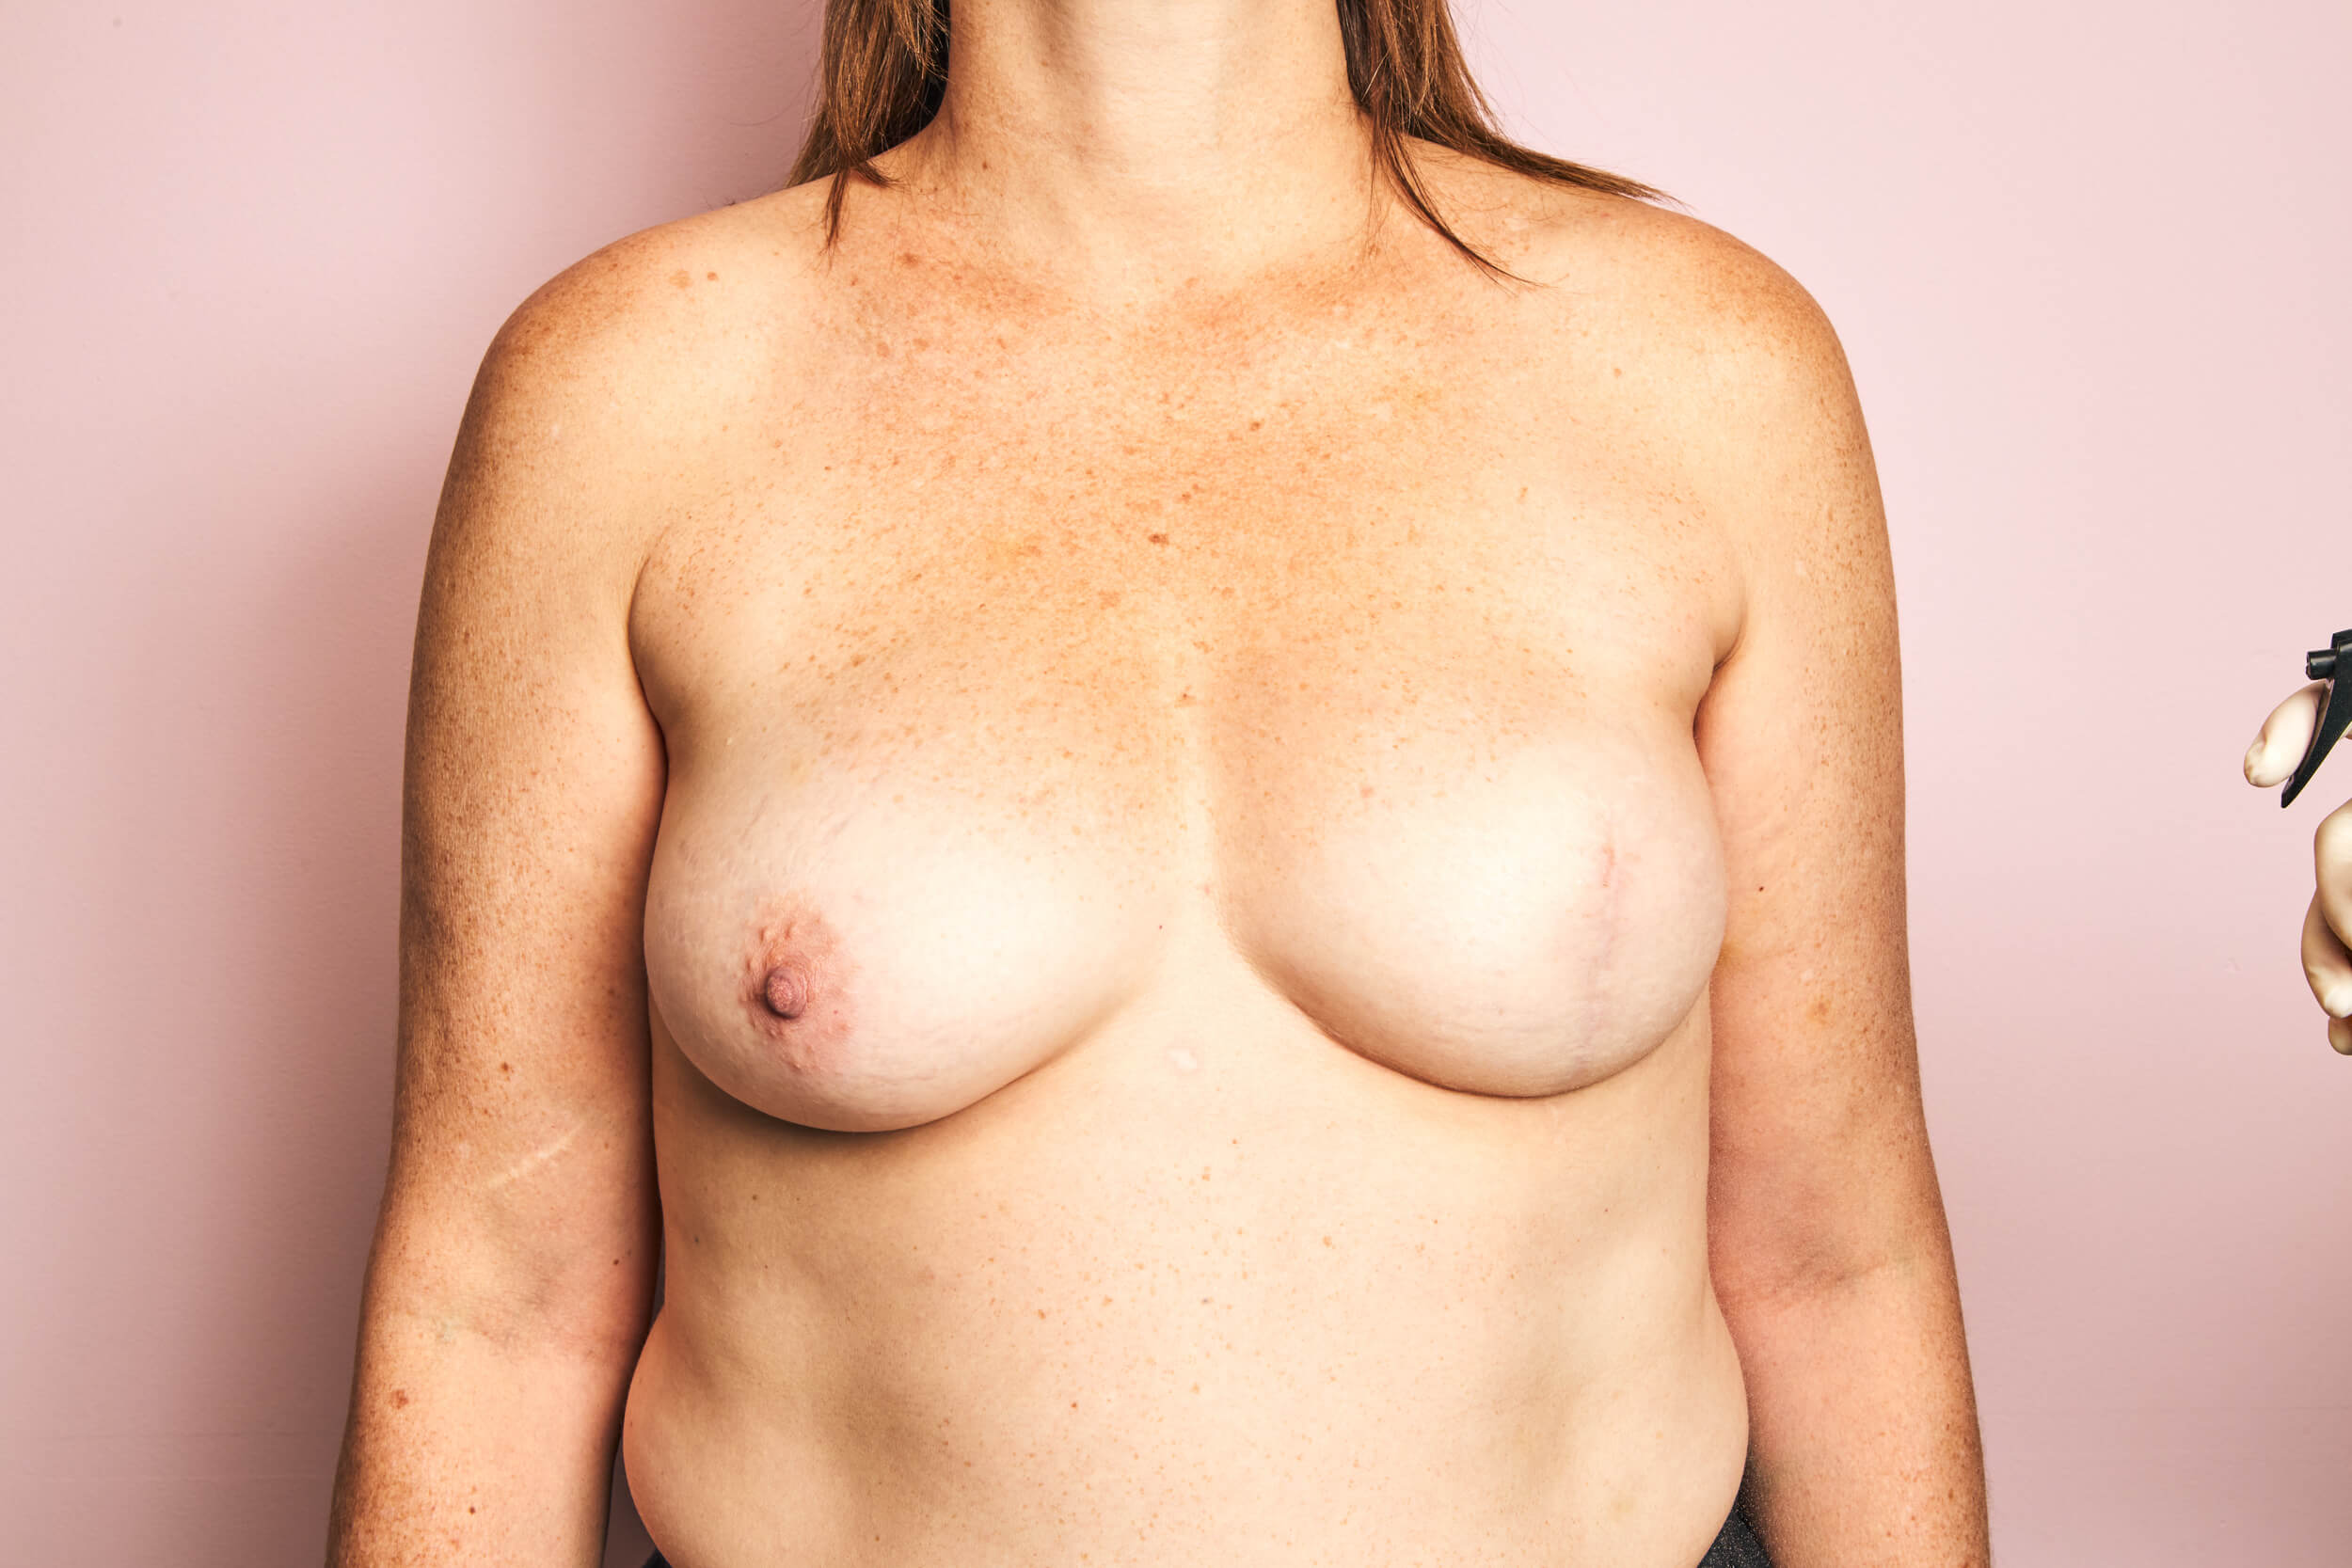
Clean the area with mild soap or alcohol and dry it completely.
Before taking the photo, gently cover your areola with your hand for about 15 seconds.
This helps preserve natural warmth, avoiding color and size distortion caused by cold or heat.

Step4
Take the Reference Photos
Before starting, take 2 photos of each breast — one close, one farther. Do the same for both breasts together, always without your face.
- Ensure the room is around 23°C (73°F) and avoid extreme temperatures.
- Photos must be clear, with good lighting, and taken by someone else — no selfies.
Step5
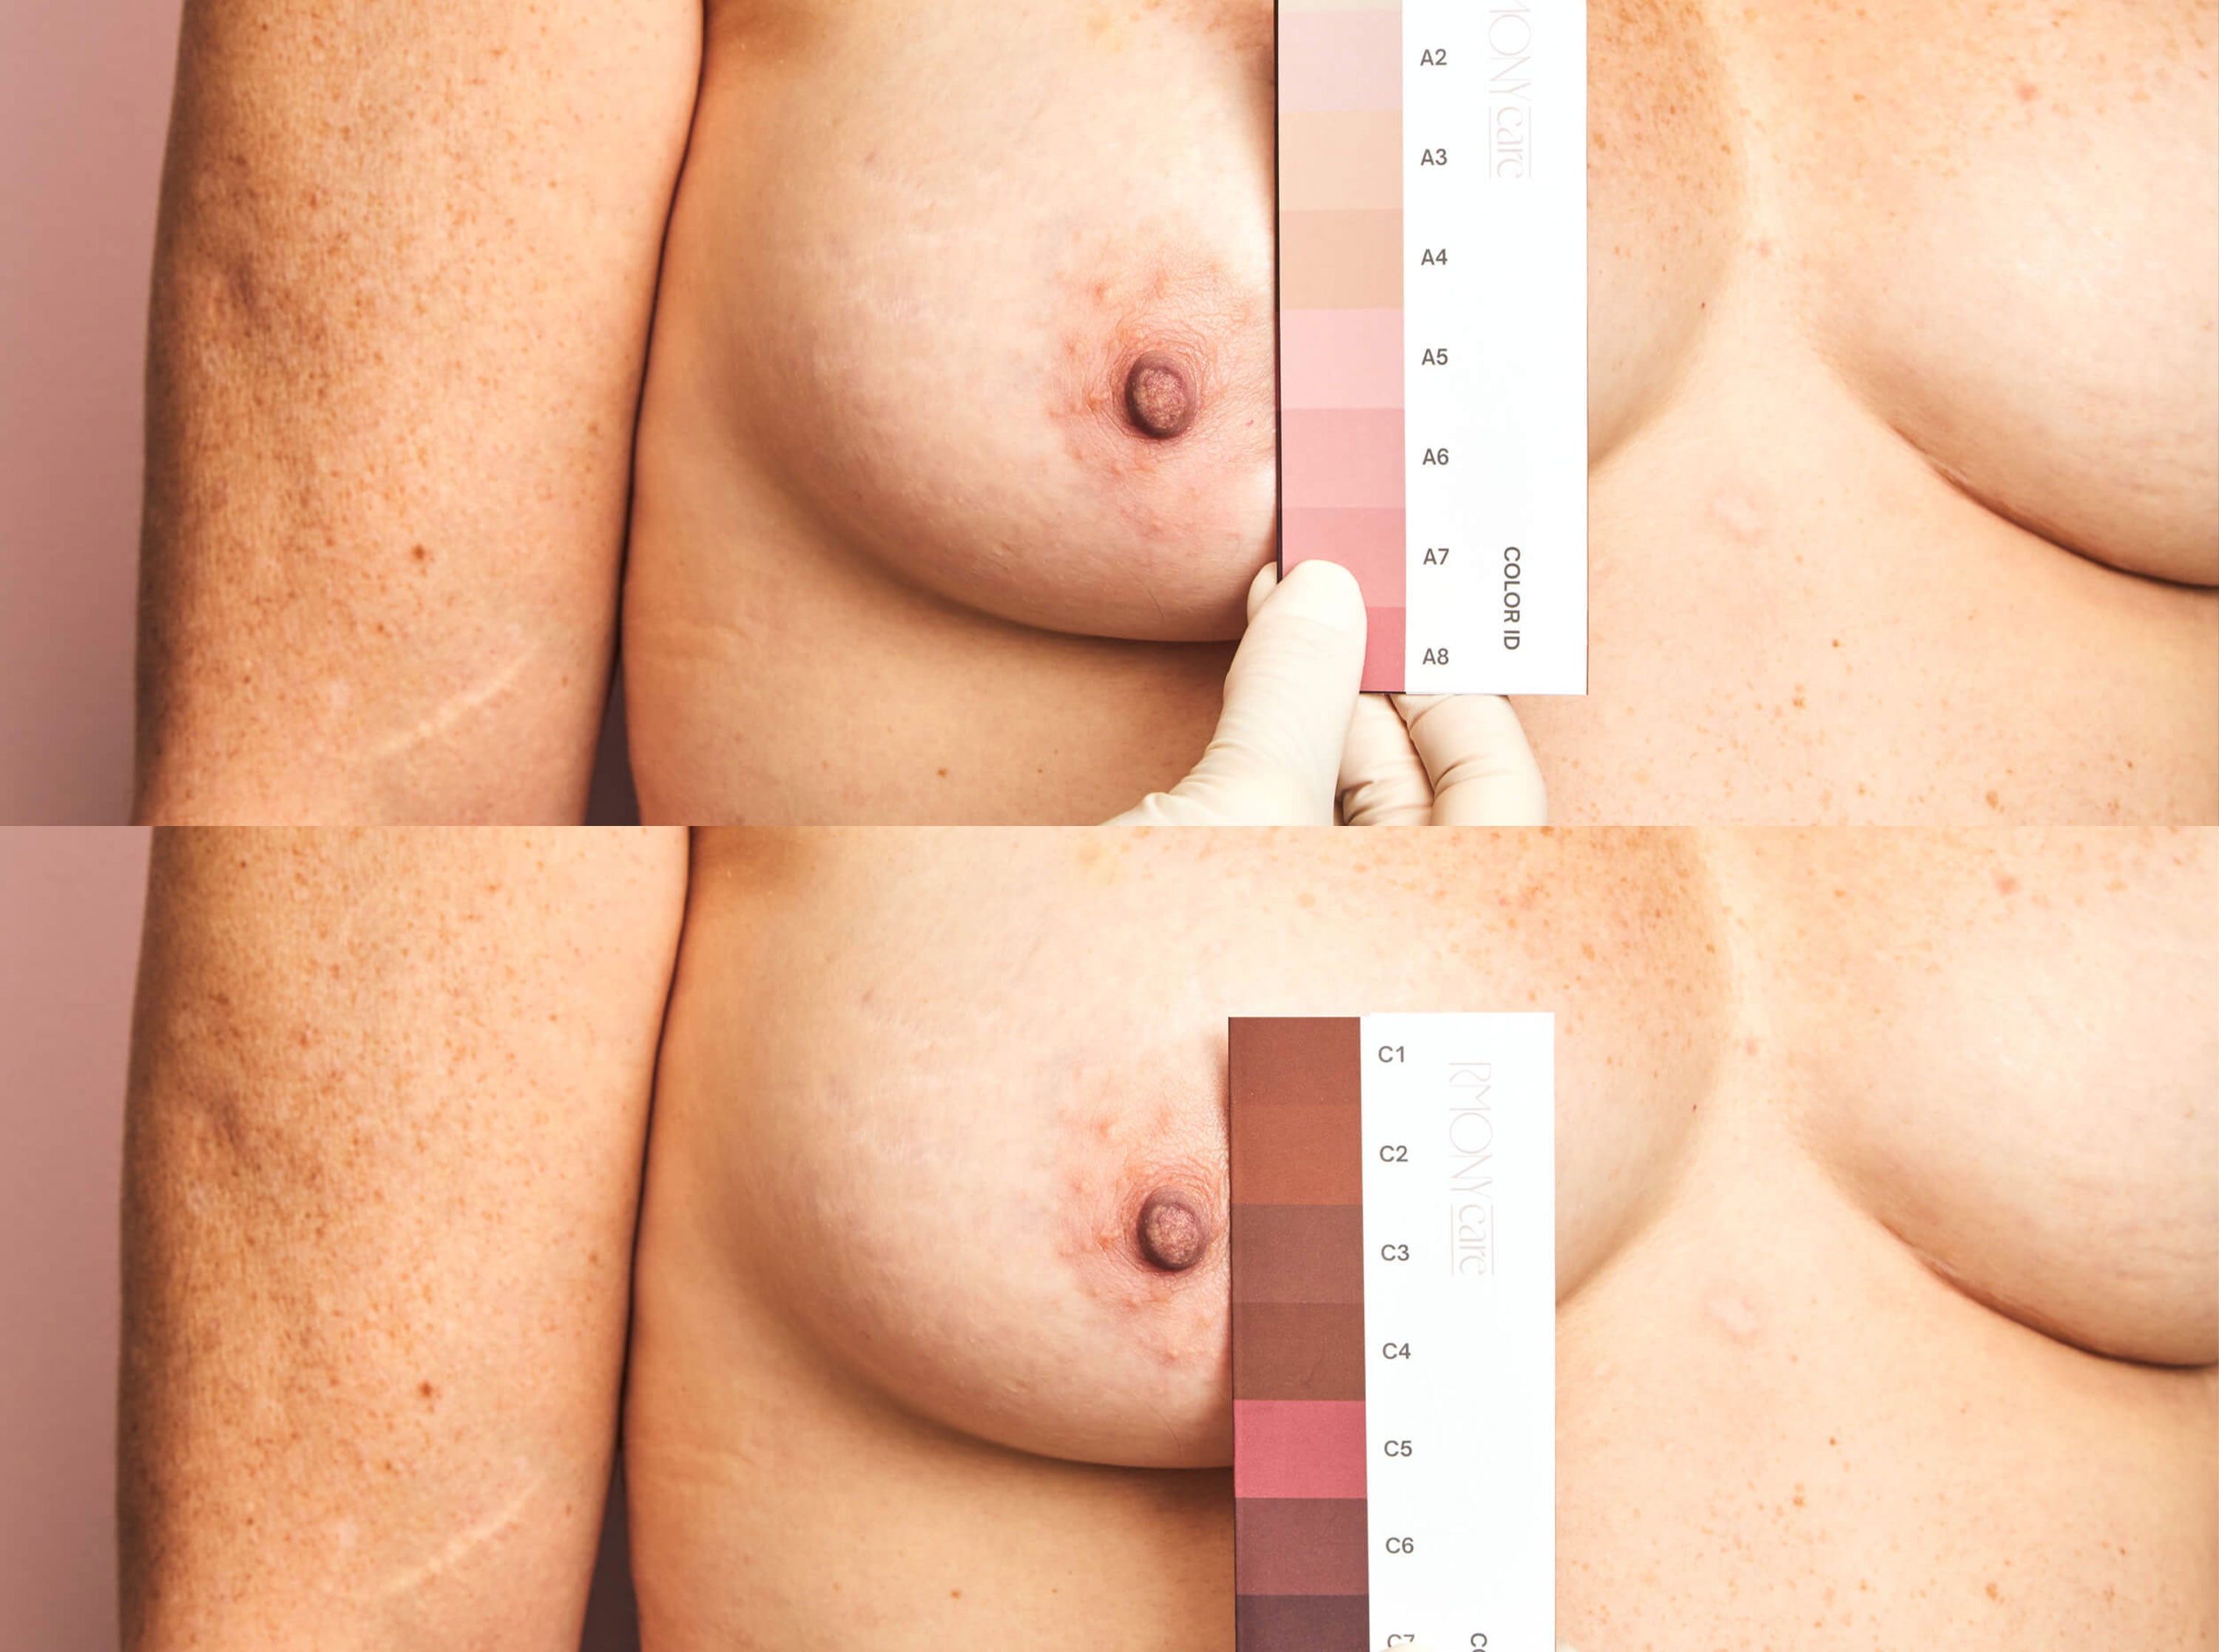
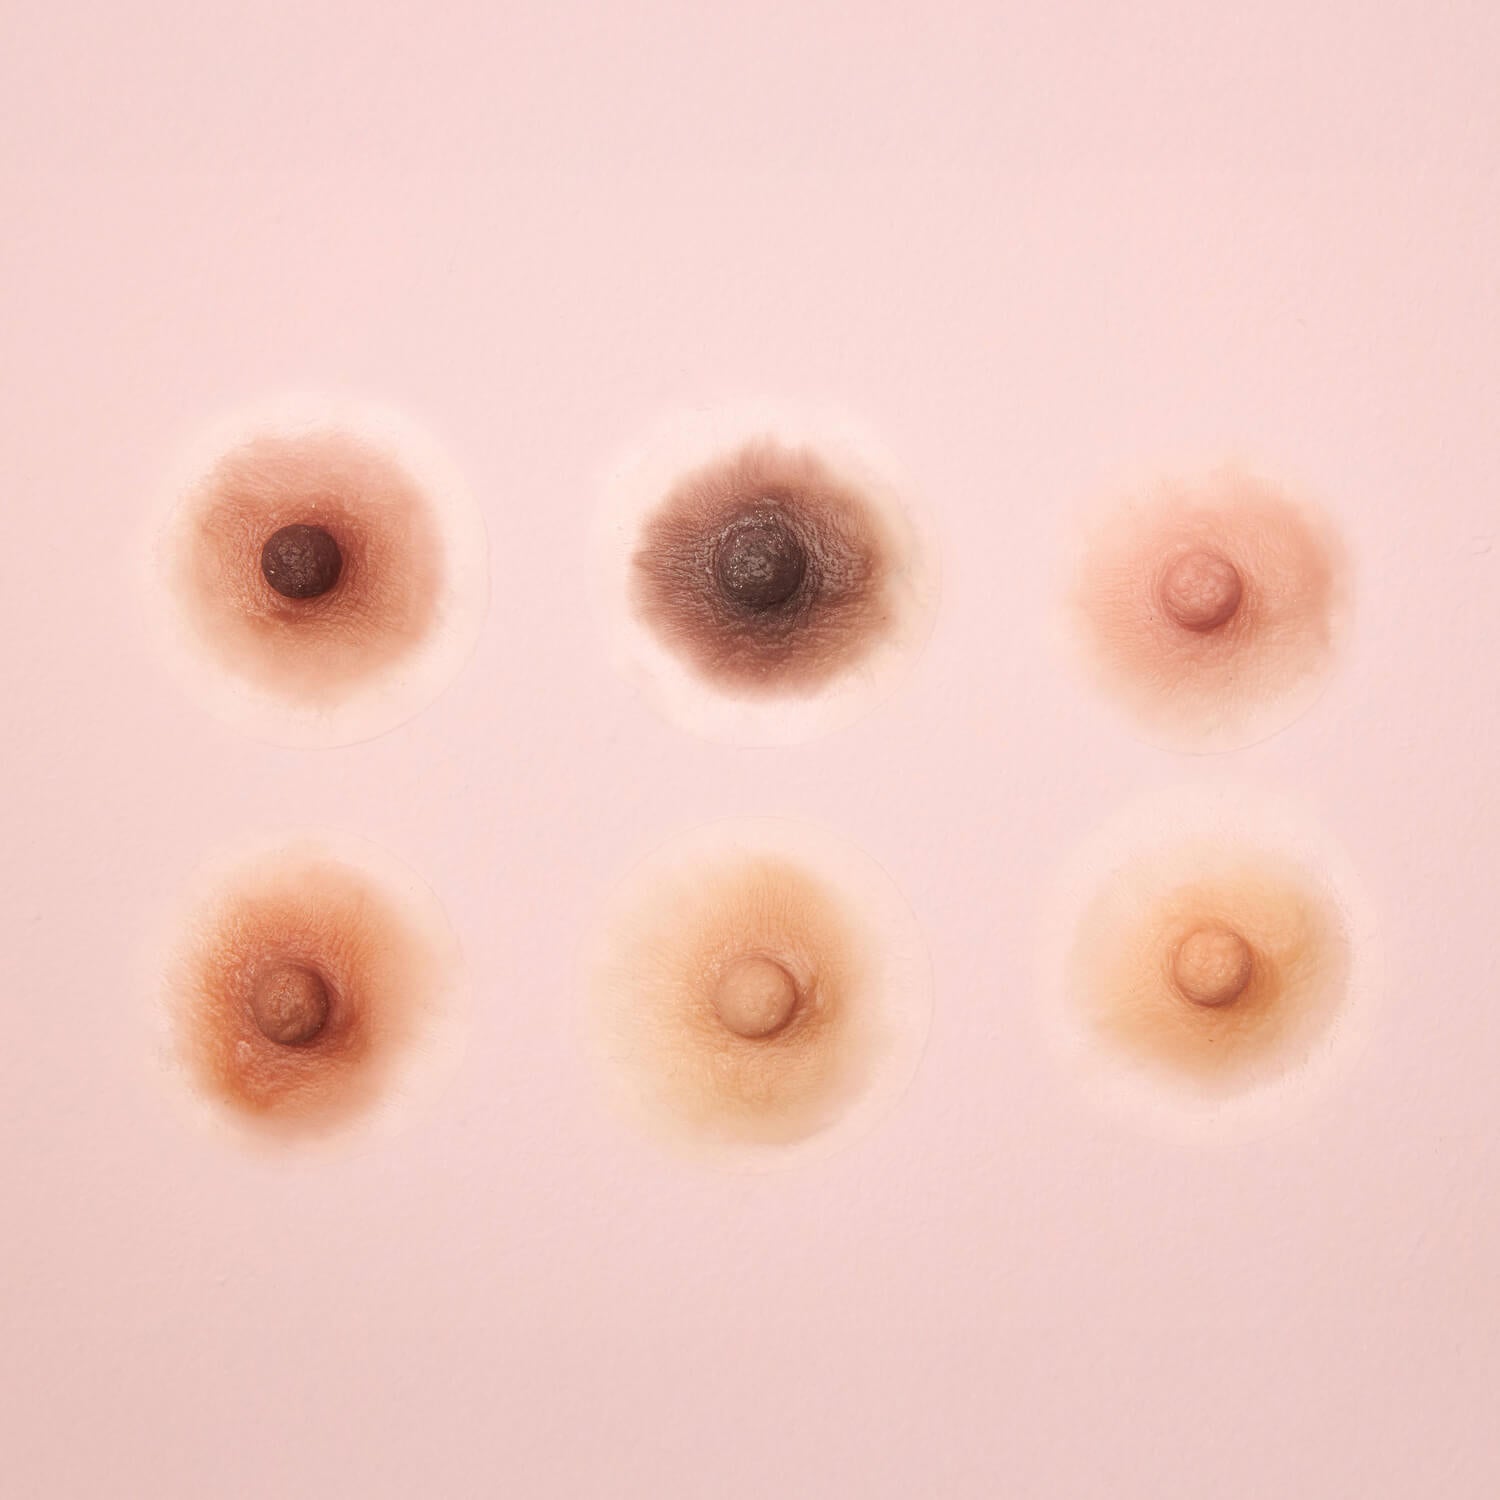
Match Your Areola & Nipple Color
Use the ID Color pallete from your kit — it has 3 sides with different tones. Find the shade that blends best with your areola.
Place it next to your breast, take a photo, and write down the color code in your form. Repeat the process for your nipple as well.
Important:
• Keep room around 23°C (73°F) and avoid extreme temperatures
• No selfies — ask someone to take the photo for better accuracy
Step6
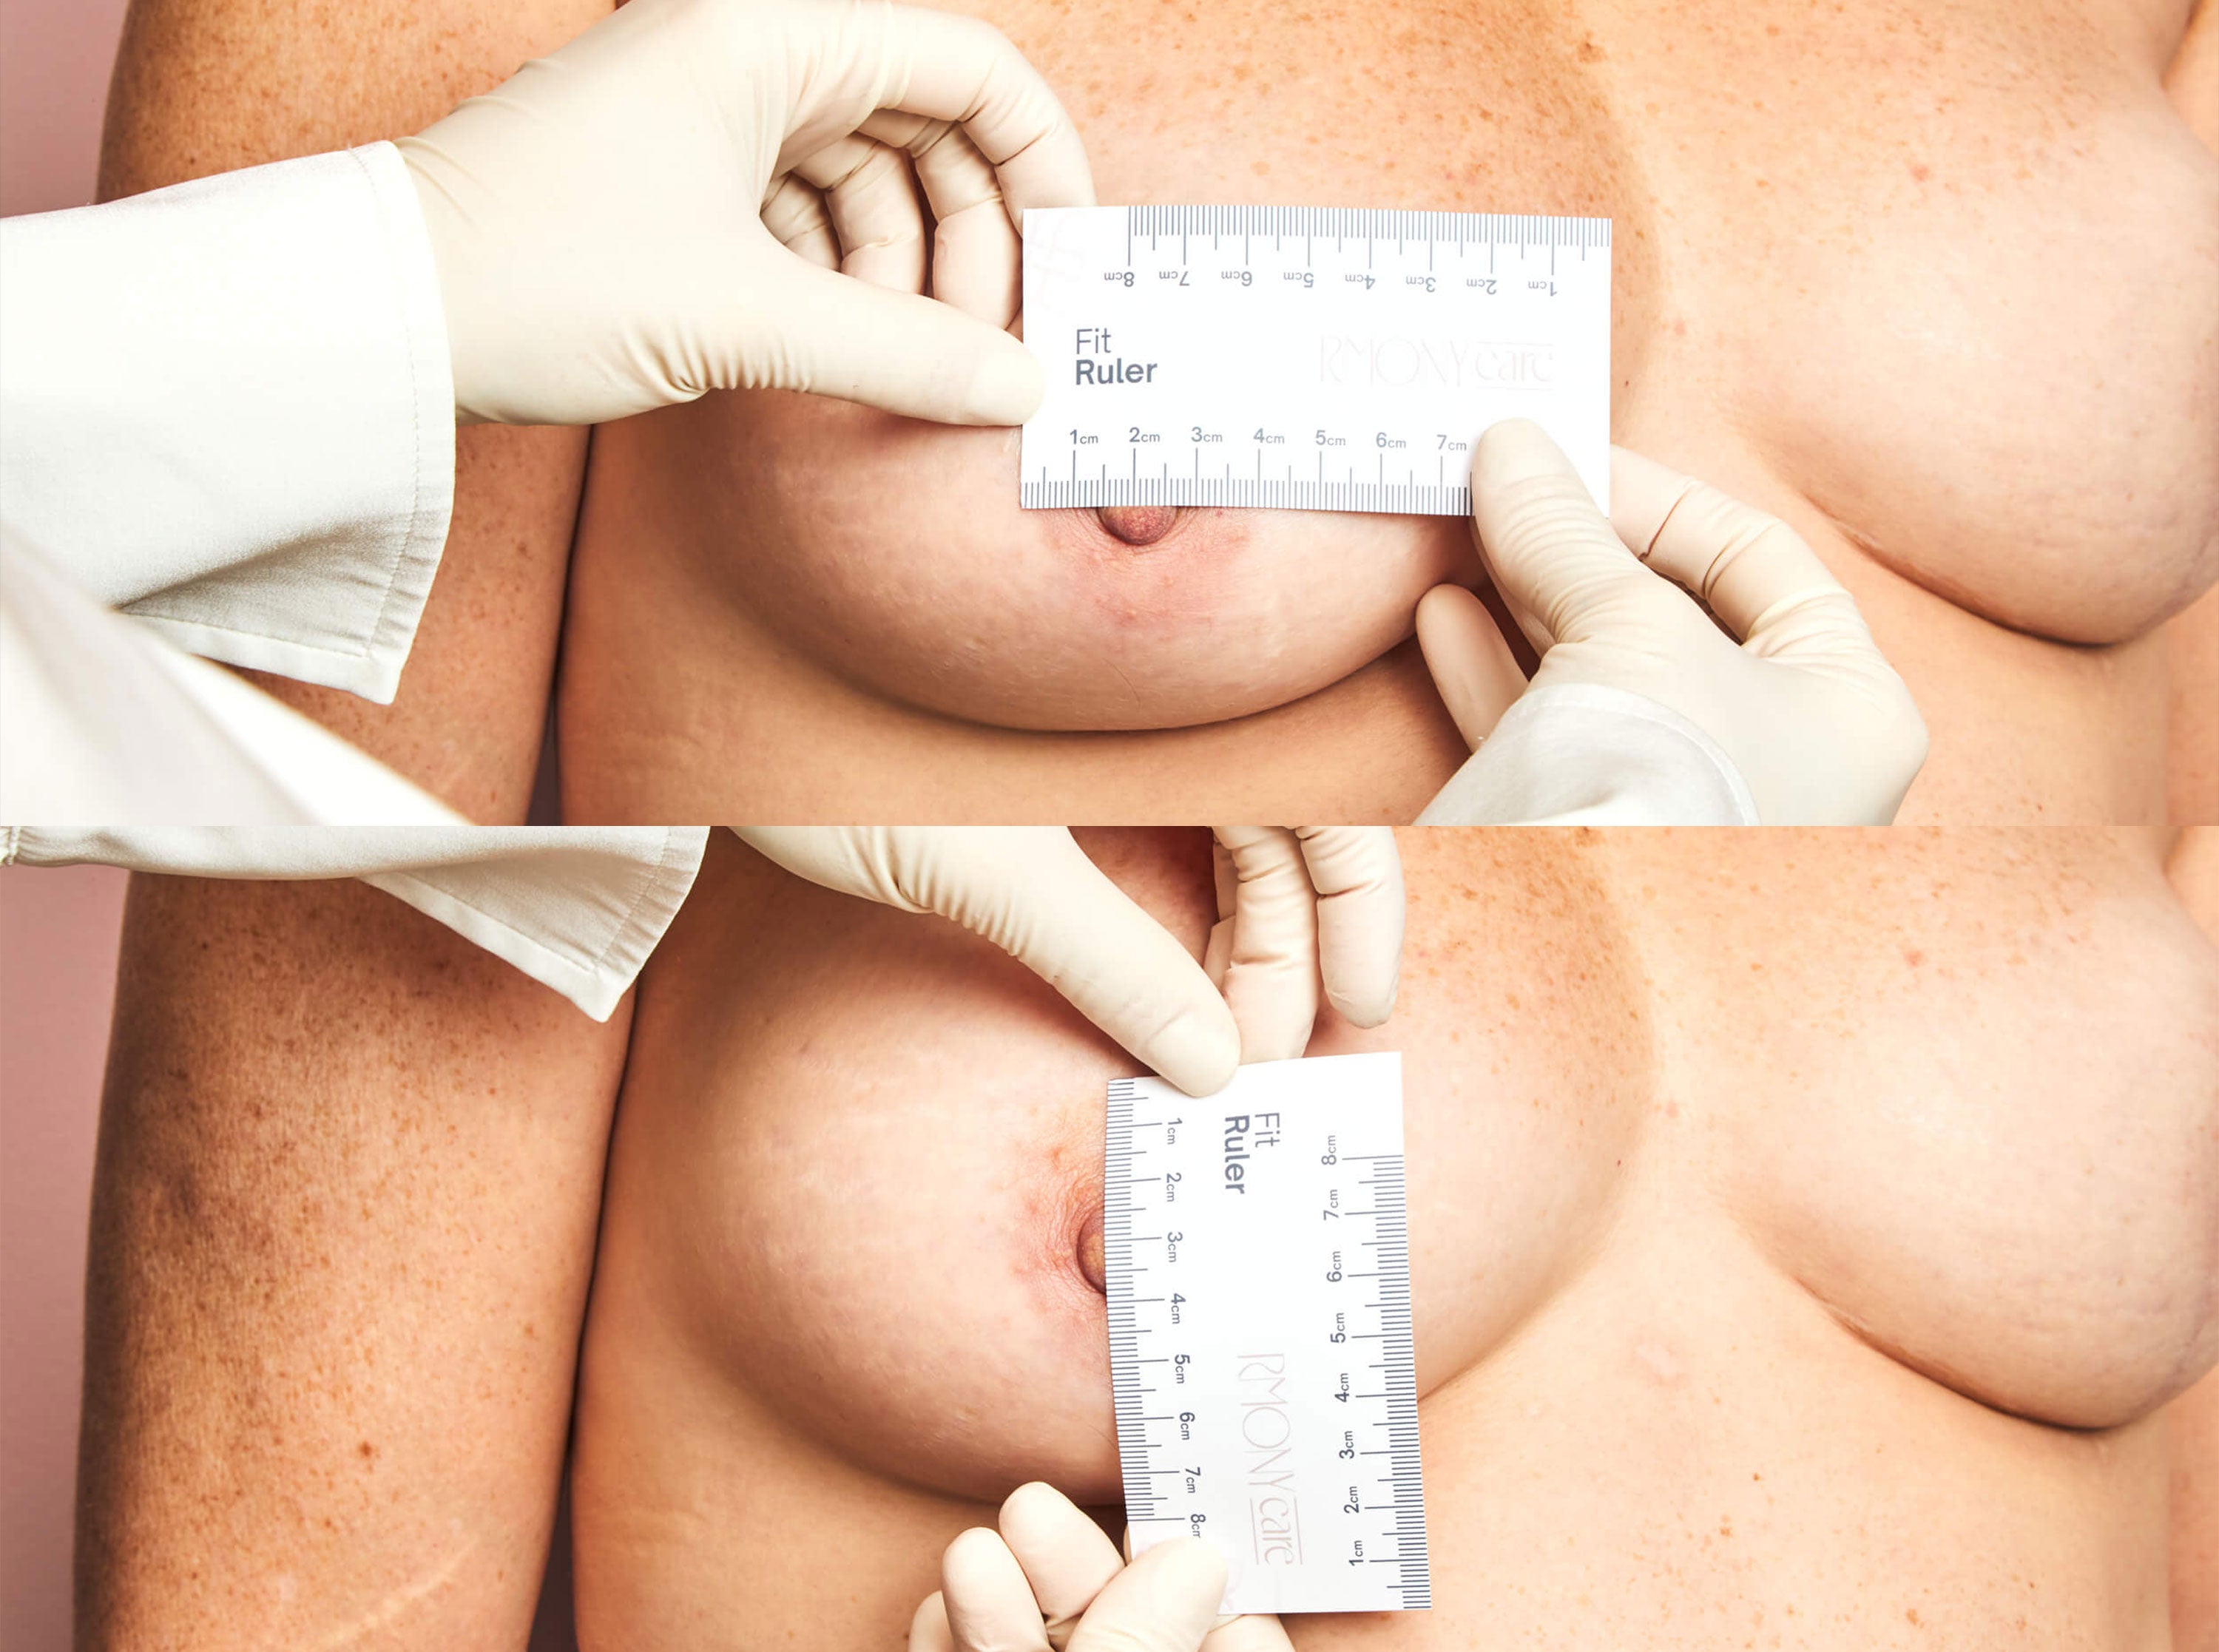
Measure Your Size
Use the Fit Ruler to measure your areola vertically and horizontally. It includes centimeters and inches — choose your preferred unit and use only that in the form.
Write down the size and take a photo with the ruler in place. Use a well-lit space and ask someone to take the photo — avoid selfies for better accuracy.
Step7
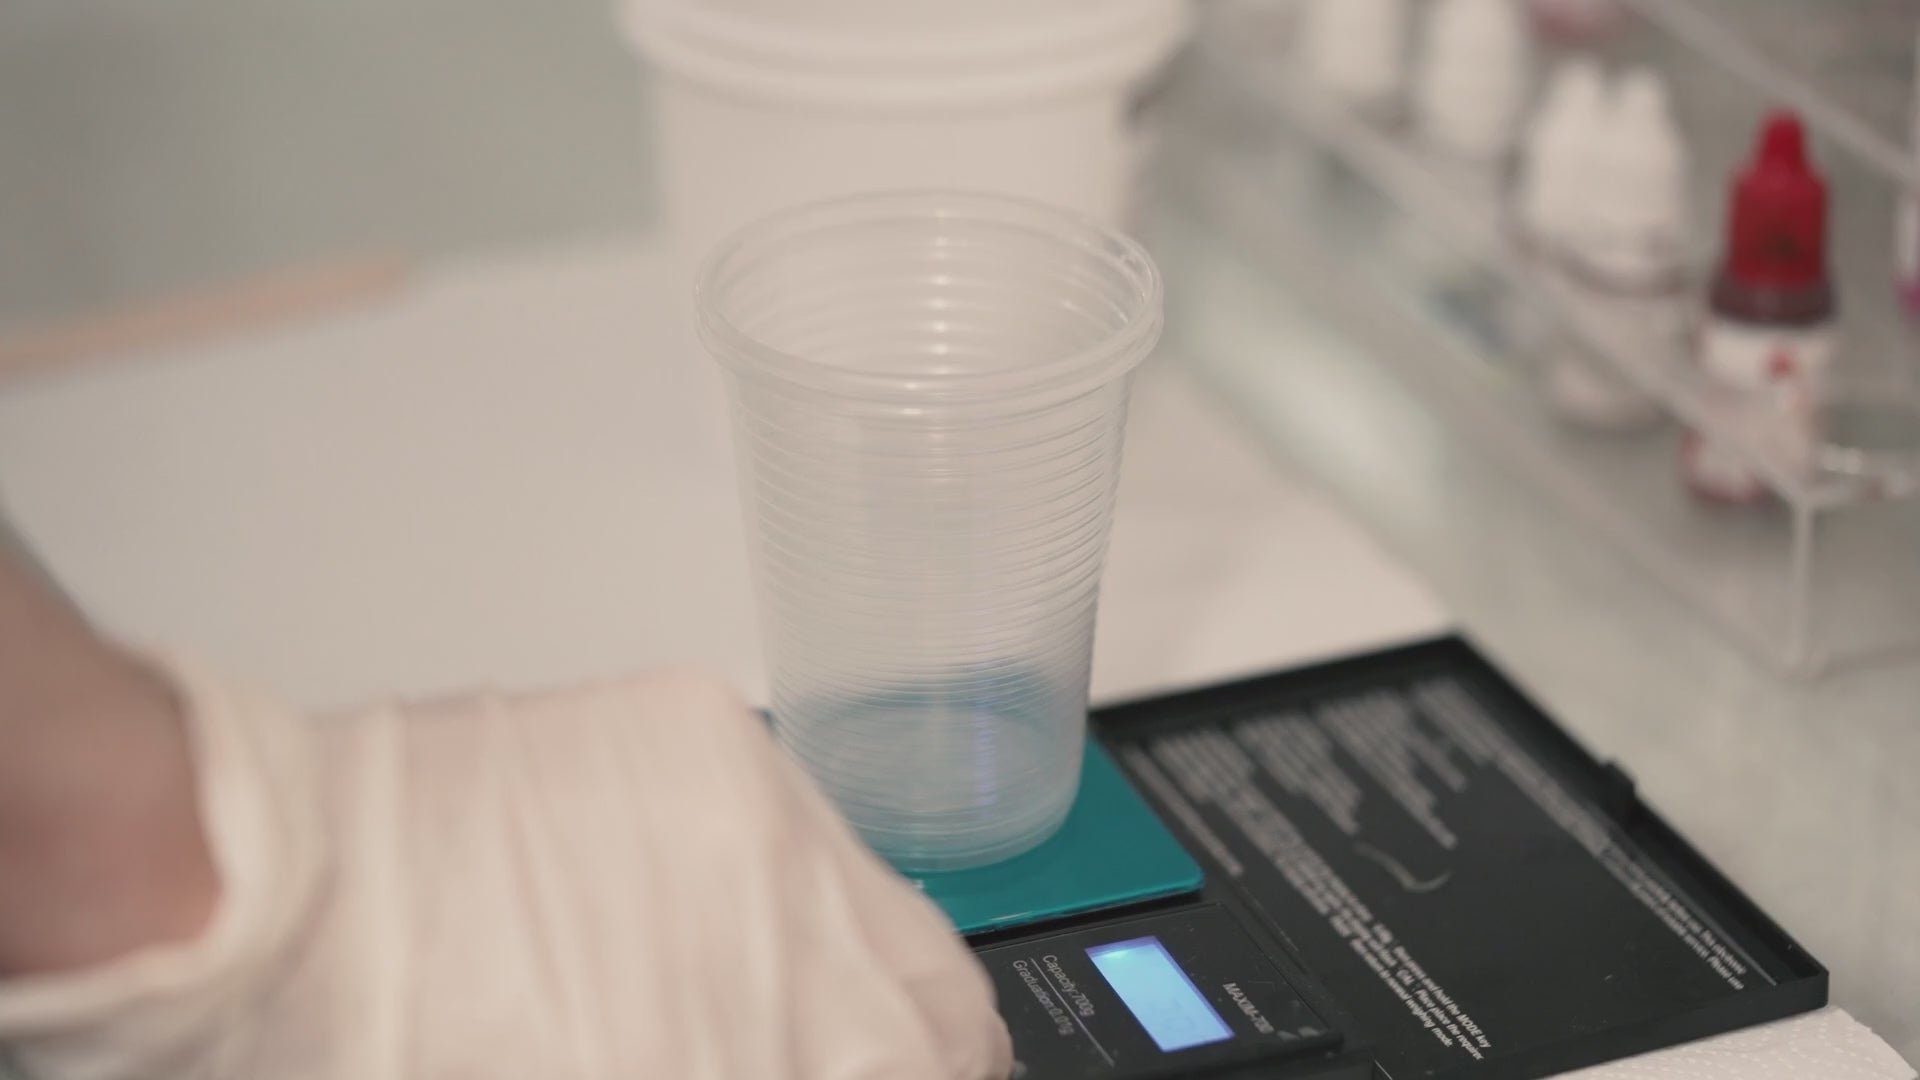
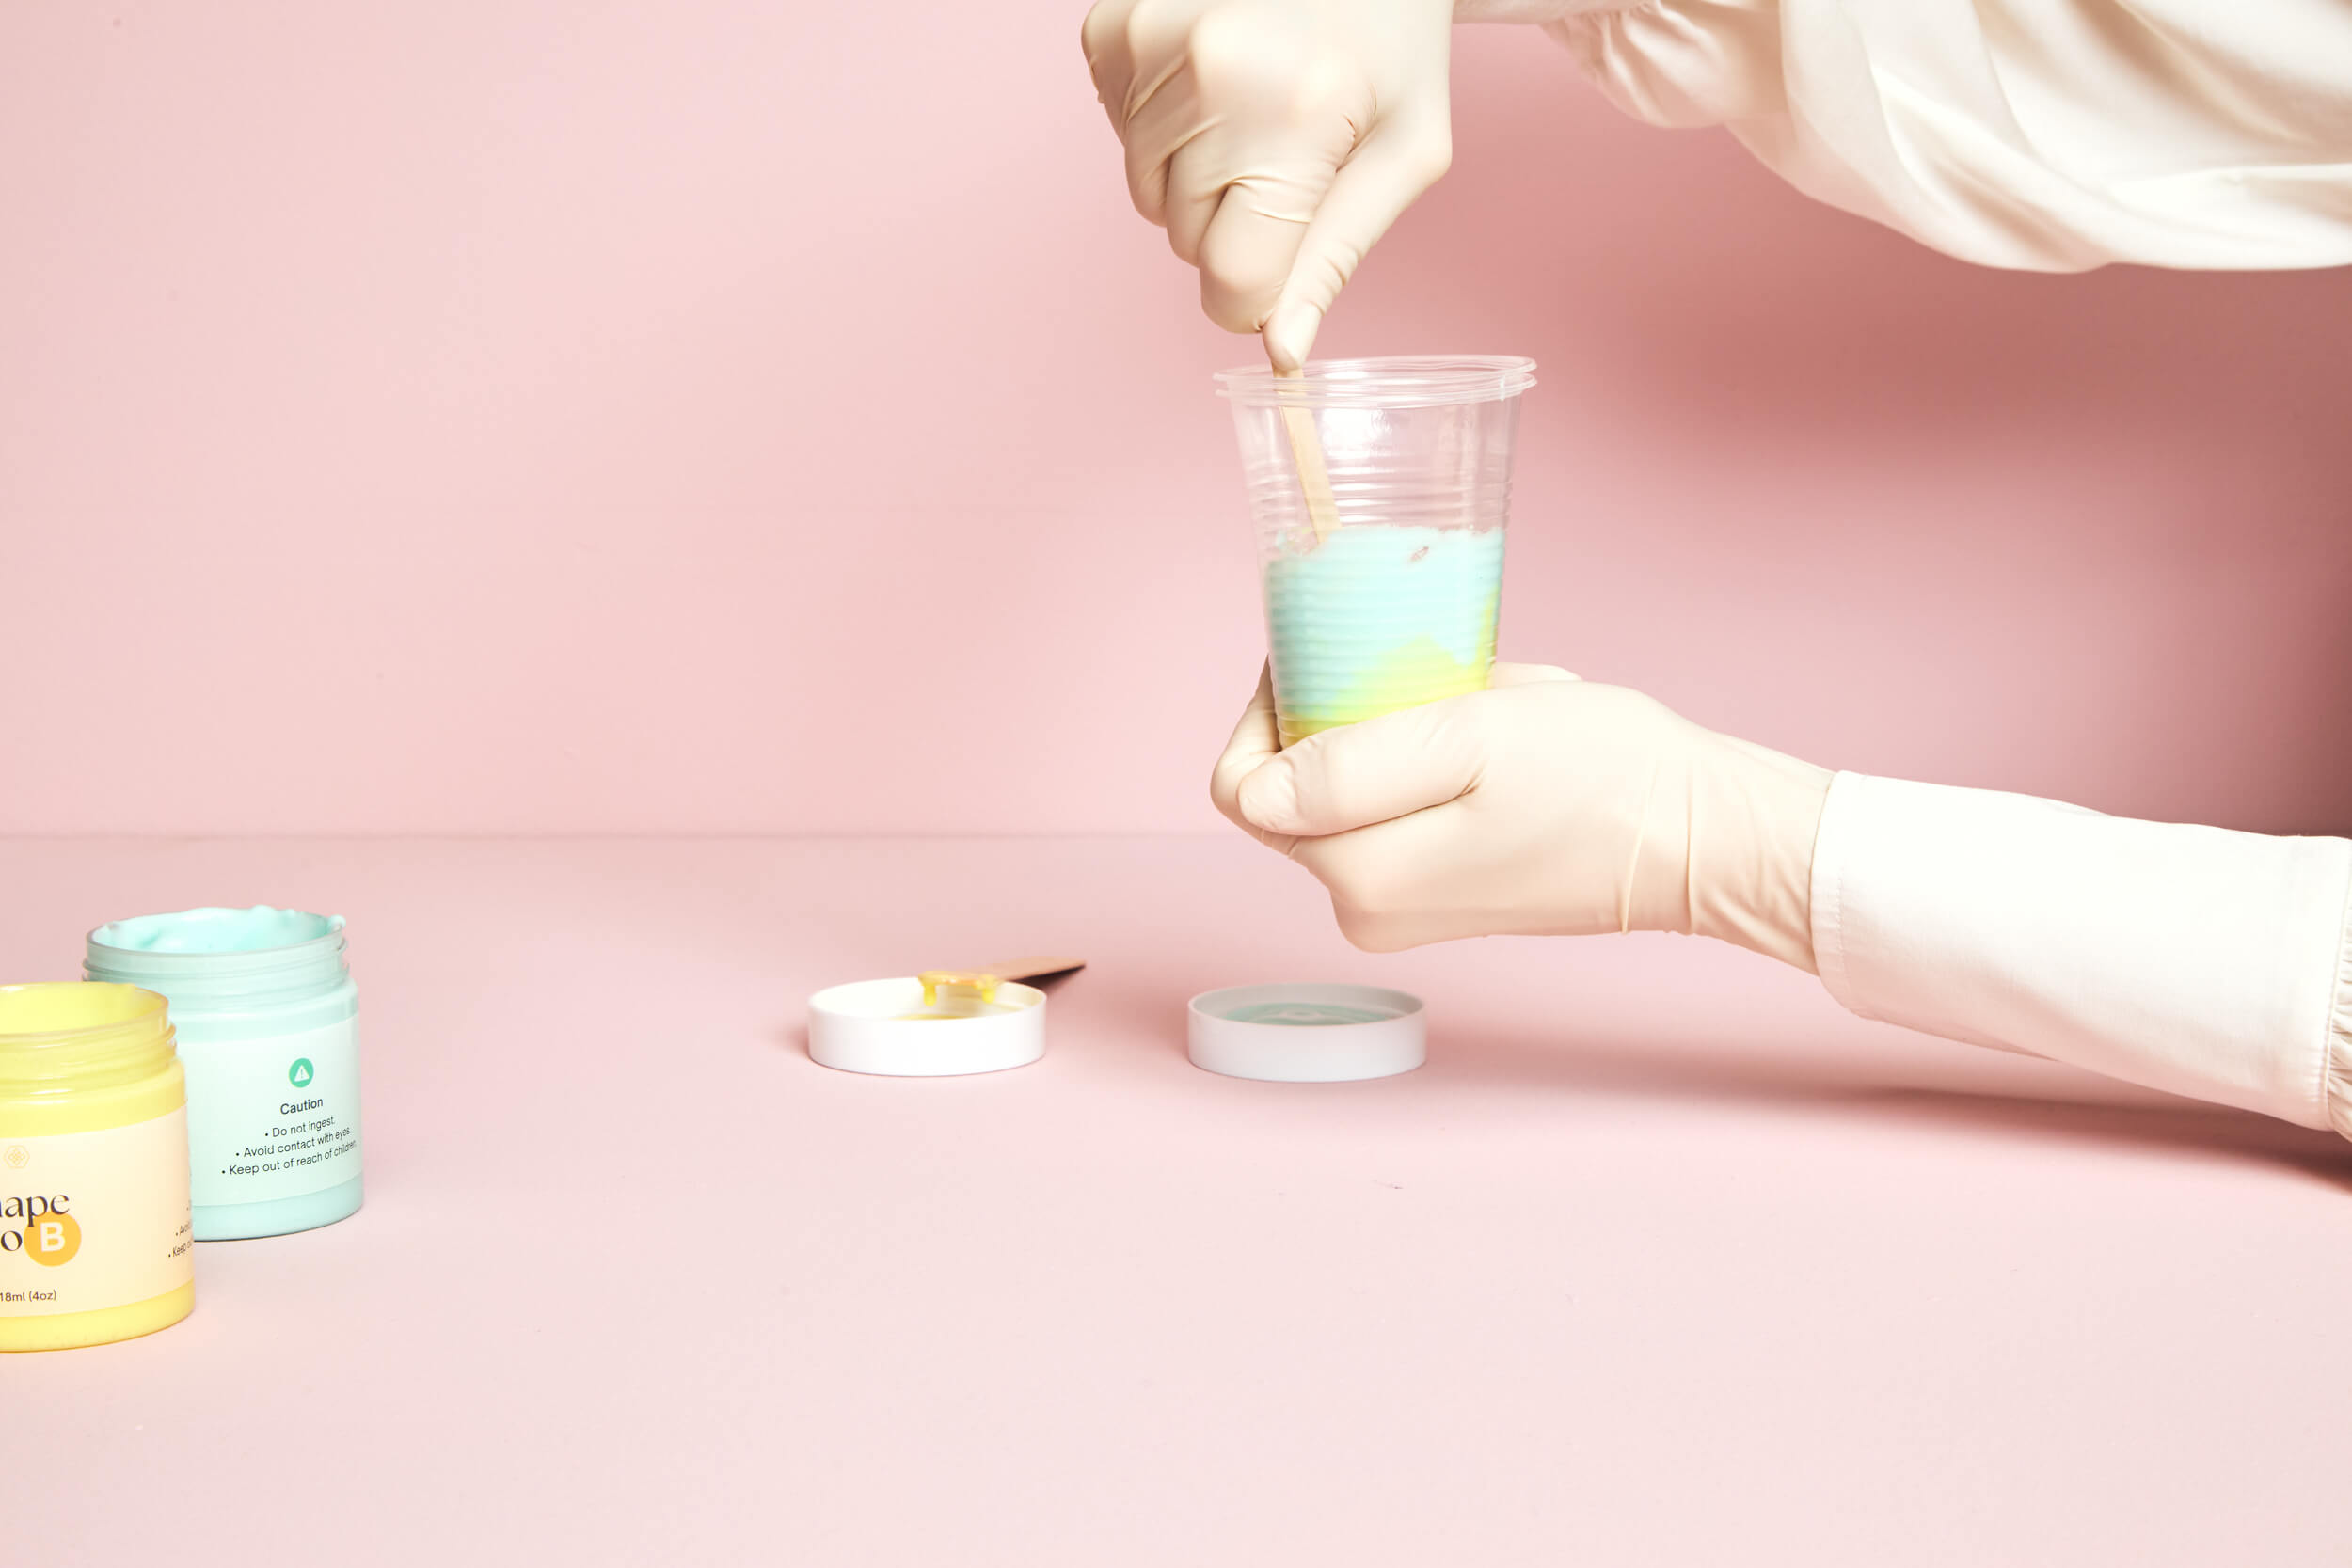
Mix the Materials
The amount of Shape Pro A and B is enough for two full impressions, plus a bit extra to help with the process.
In a disposable or glass cup:
• Use one spatula to scoop slightly less than half of Shape Pro A. Discard the spatula.
• Use a new spatula to scoop the same amount of Shape Pro B into the same cup.
• With this spatula, mix quickly and firmly for 10-25 seconds.
Step8
Keep the Right Posture
⚠️ Before starting the molding process, make sure you are standing upright, keeping your body straight, and remain in that position until the mold is removed.
Do not sit or bend forward — this can distort the final shape of the prosthesis.
💡 Tip: Rewatch the video to ensure your application is correct and safe.
Step9
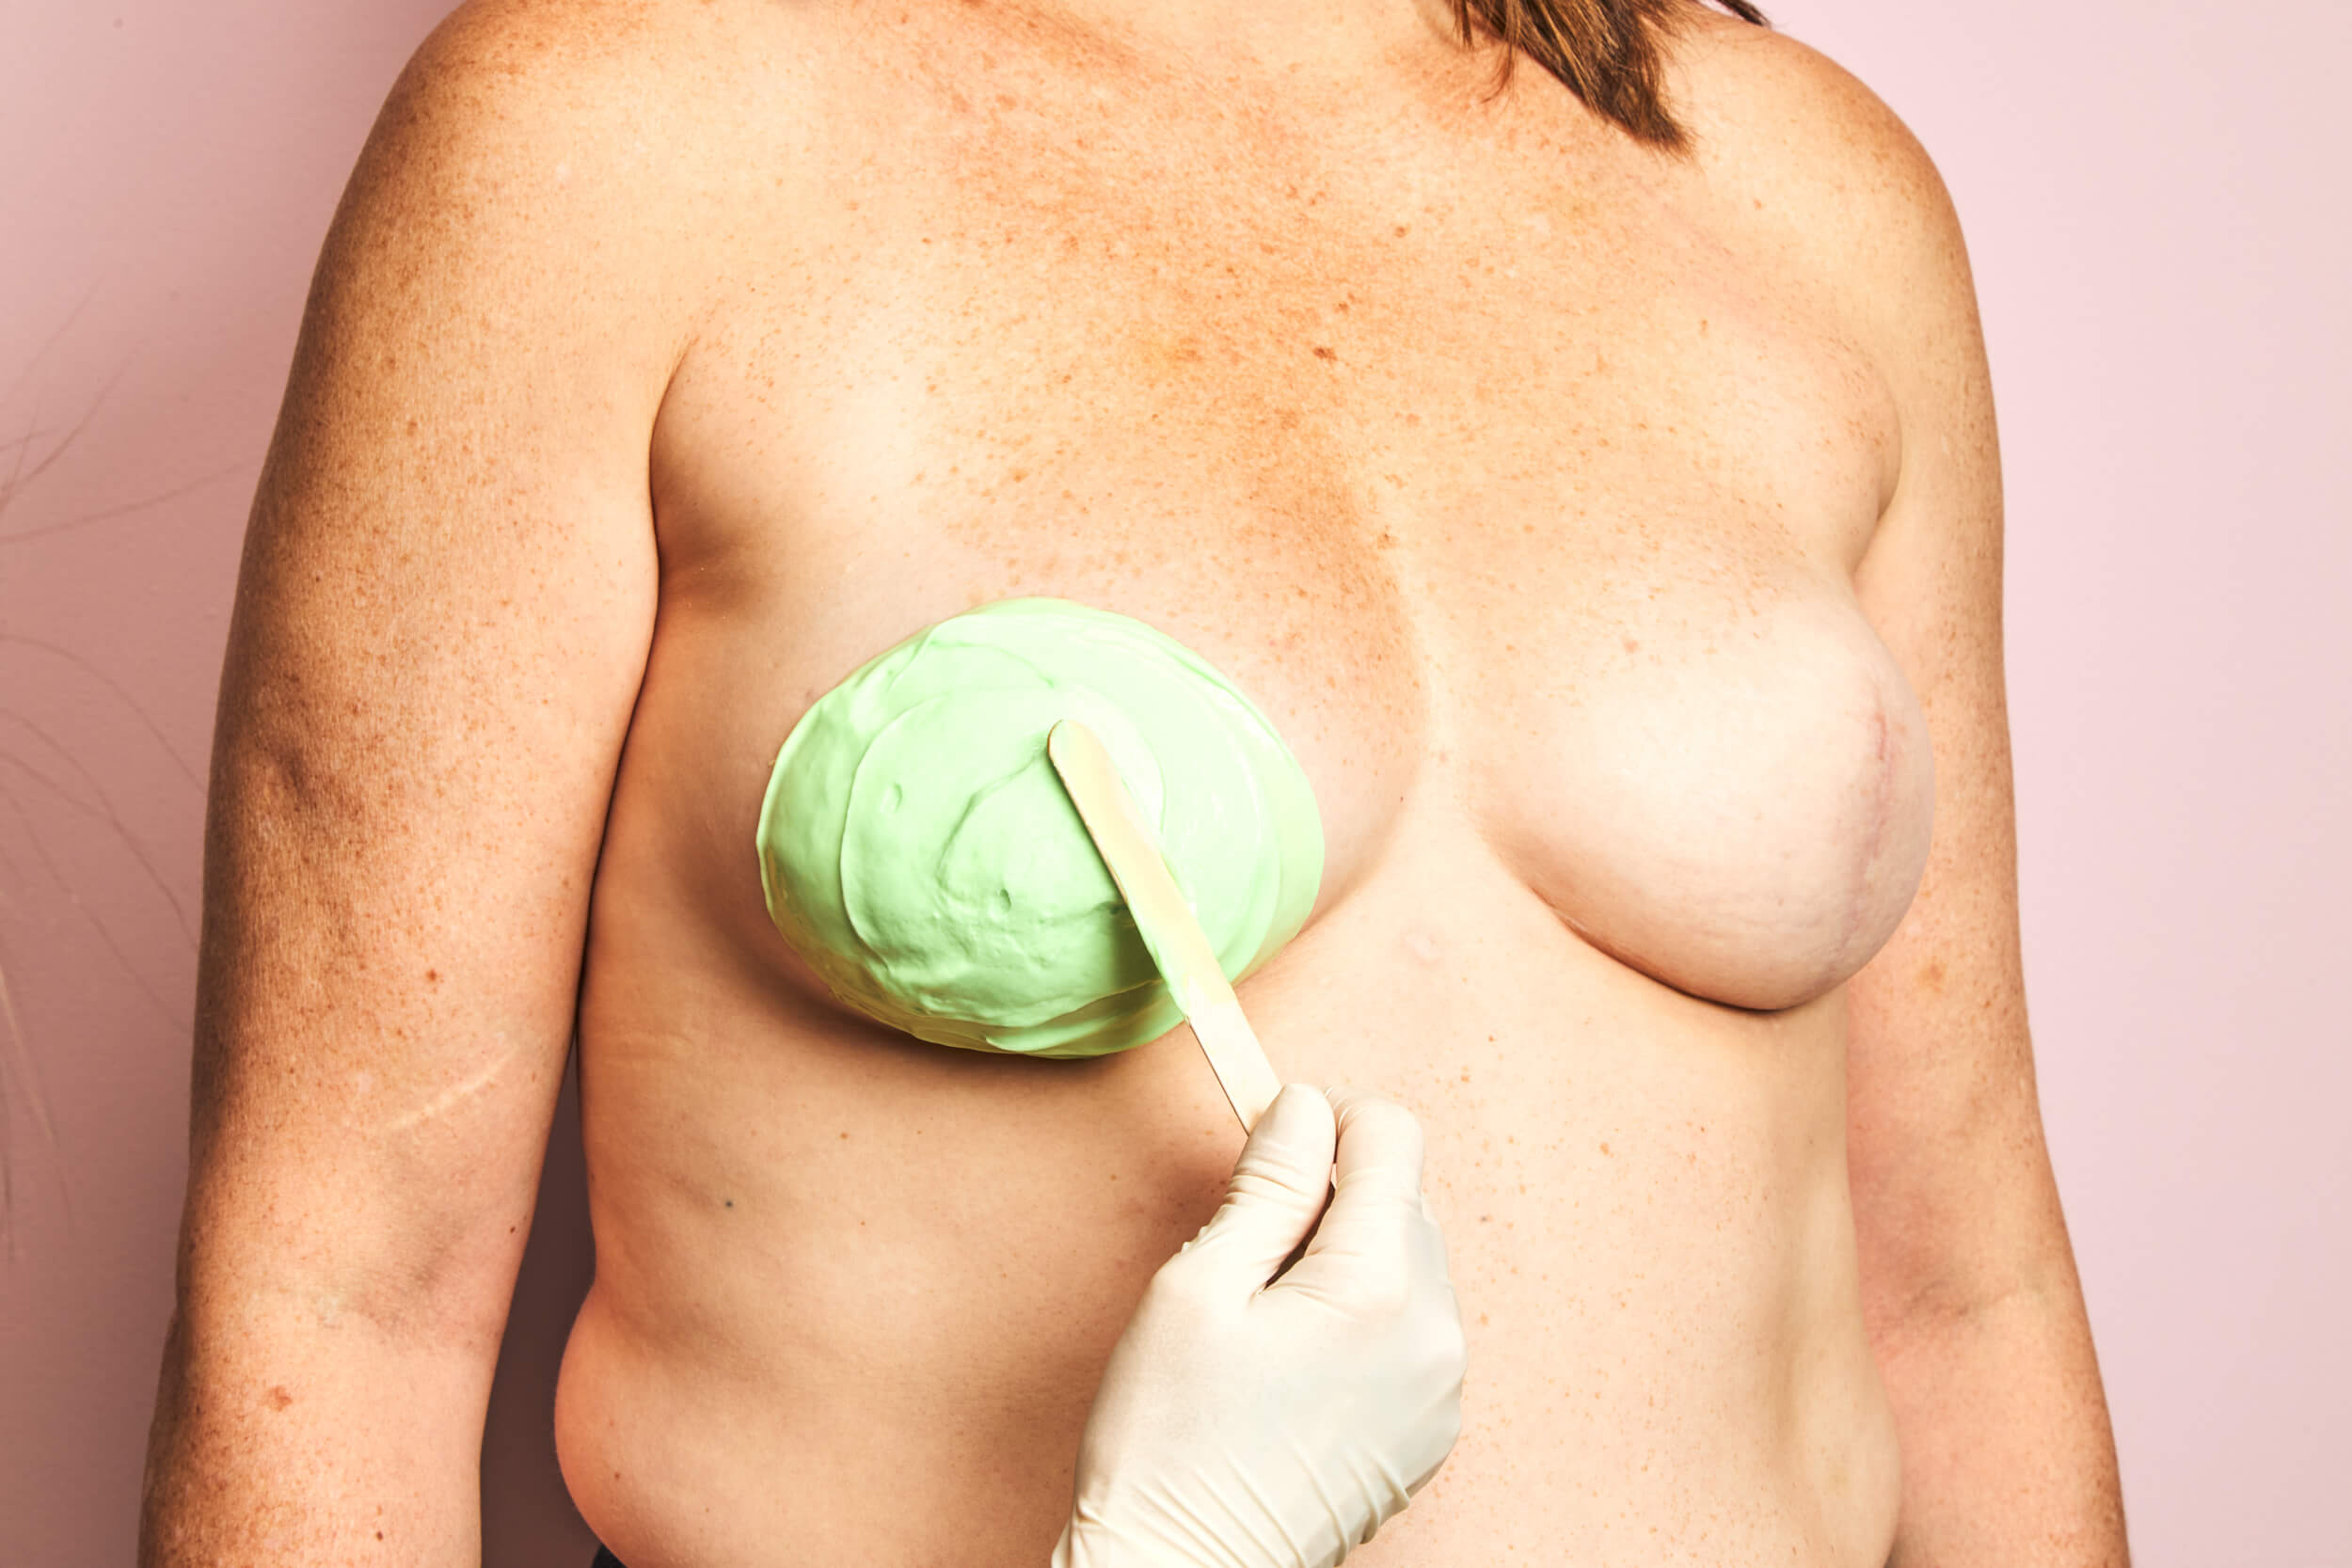
Apply the Mixture
⚠️ Do not exceed 25 seconds of mixing — the material will begin to harden fast.
Spread the mixture over the areola, covering it entirely.
Add a second layer over the nipple and surrounding area to reinforce the center and prevent damage when removing the mold.

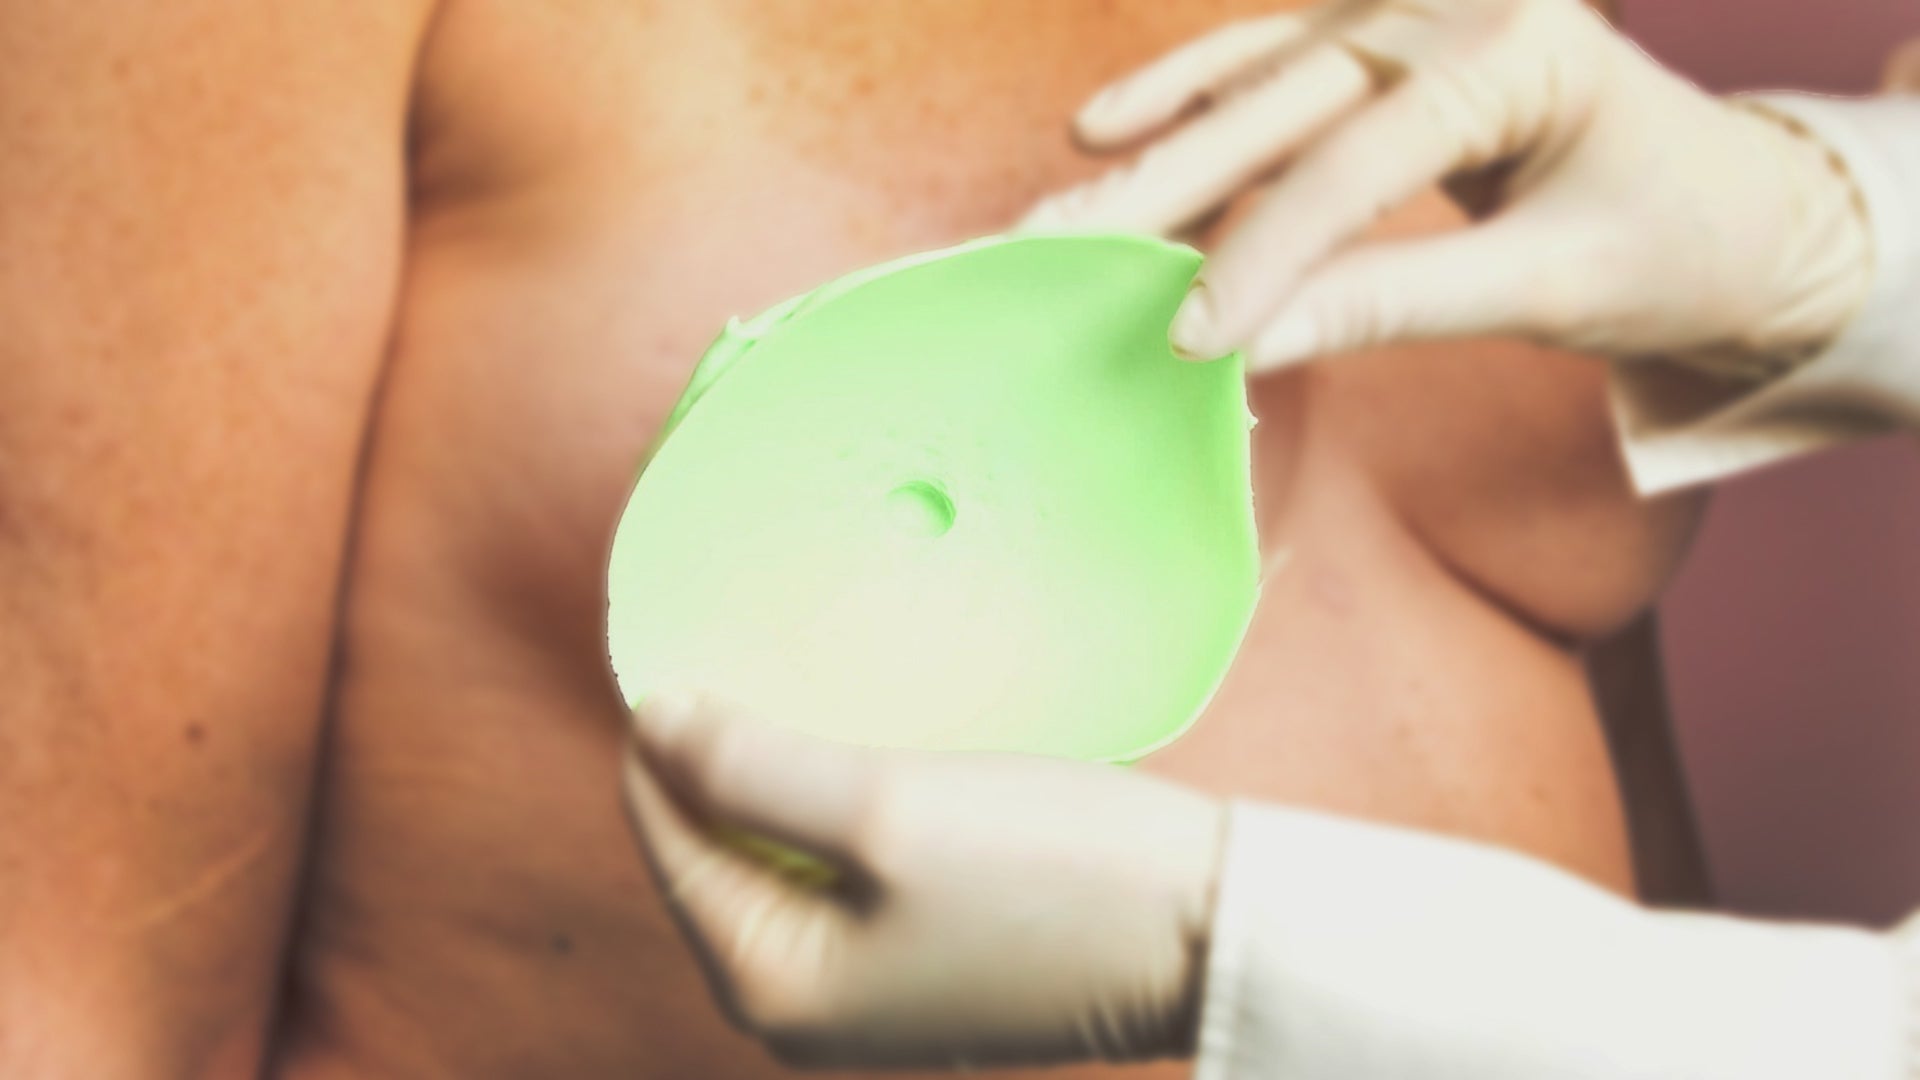
Step10
Wait and Detach the Mold
Let the material rest for 12–15 minutes.
You’ll know it’s ready when it no longer sticks to your fingers, even if it still looks shiny.
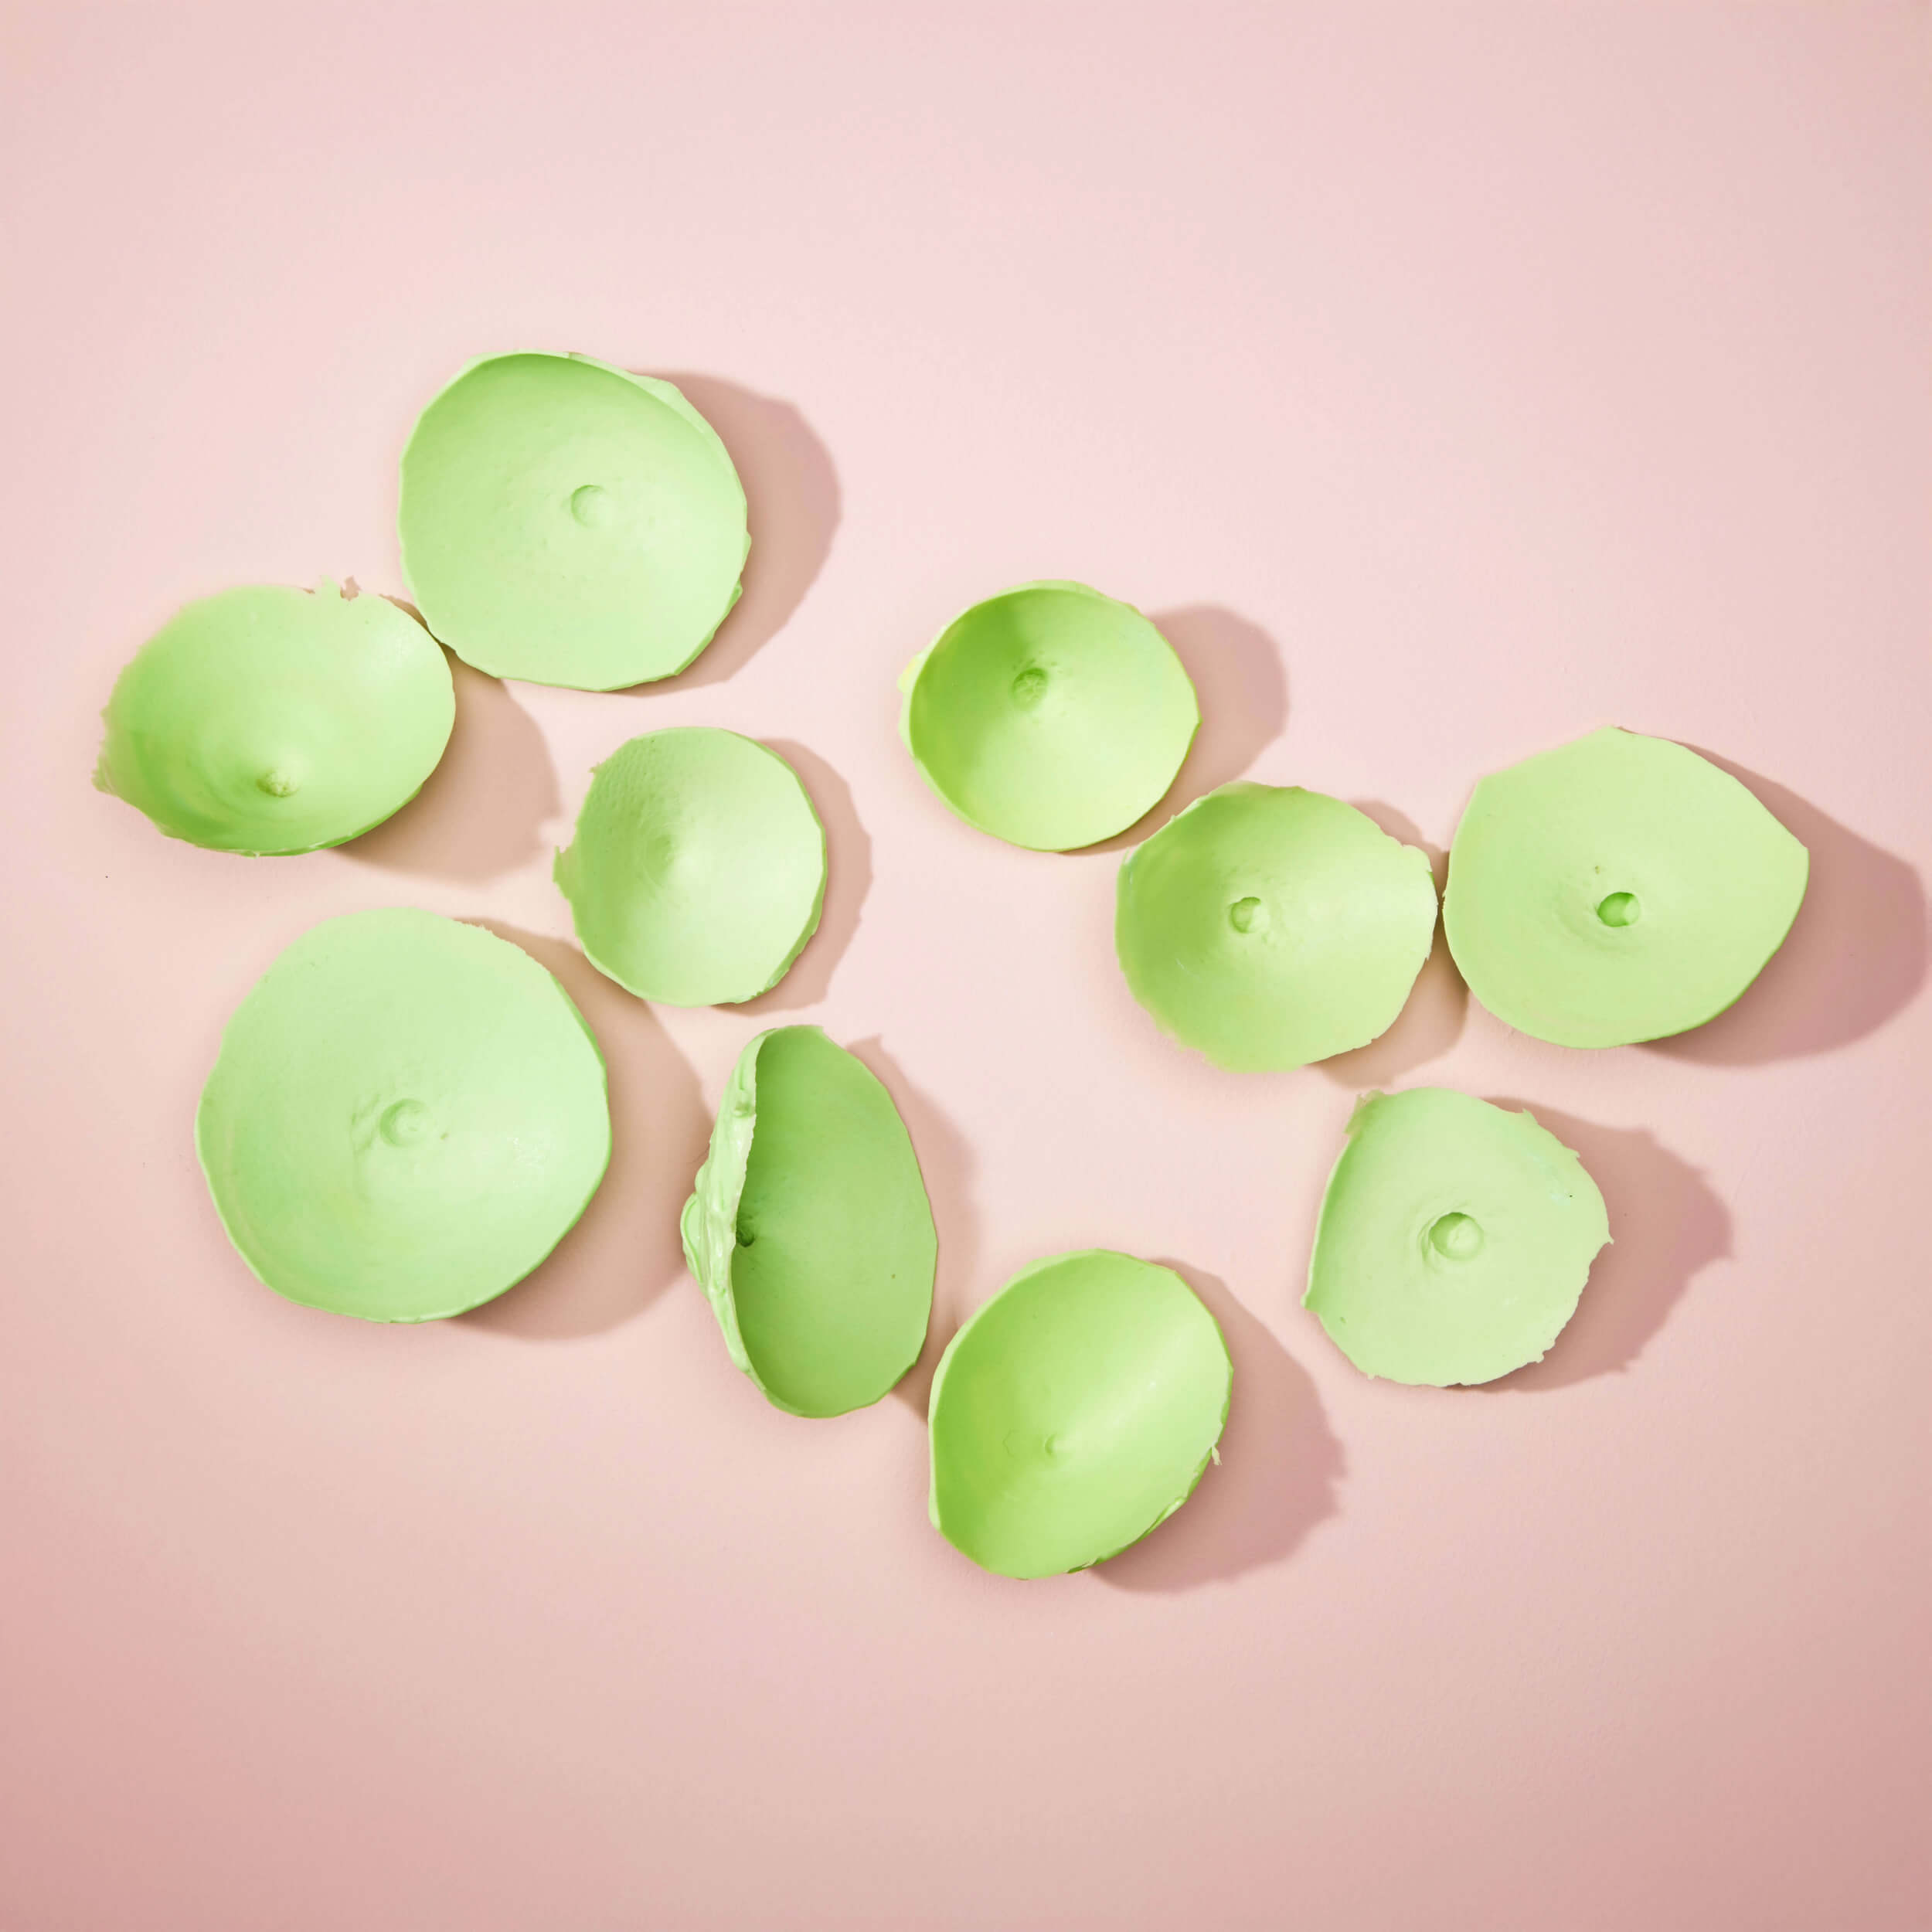
Once dry, gently start lifting the mold from the edges, working slowly and carefully toward the center until it fully detaches from your skin.
Step11
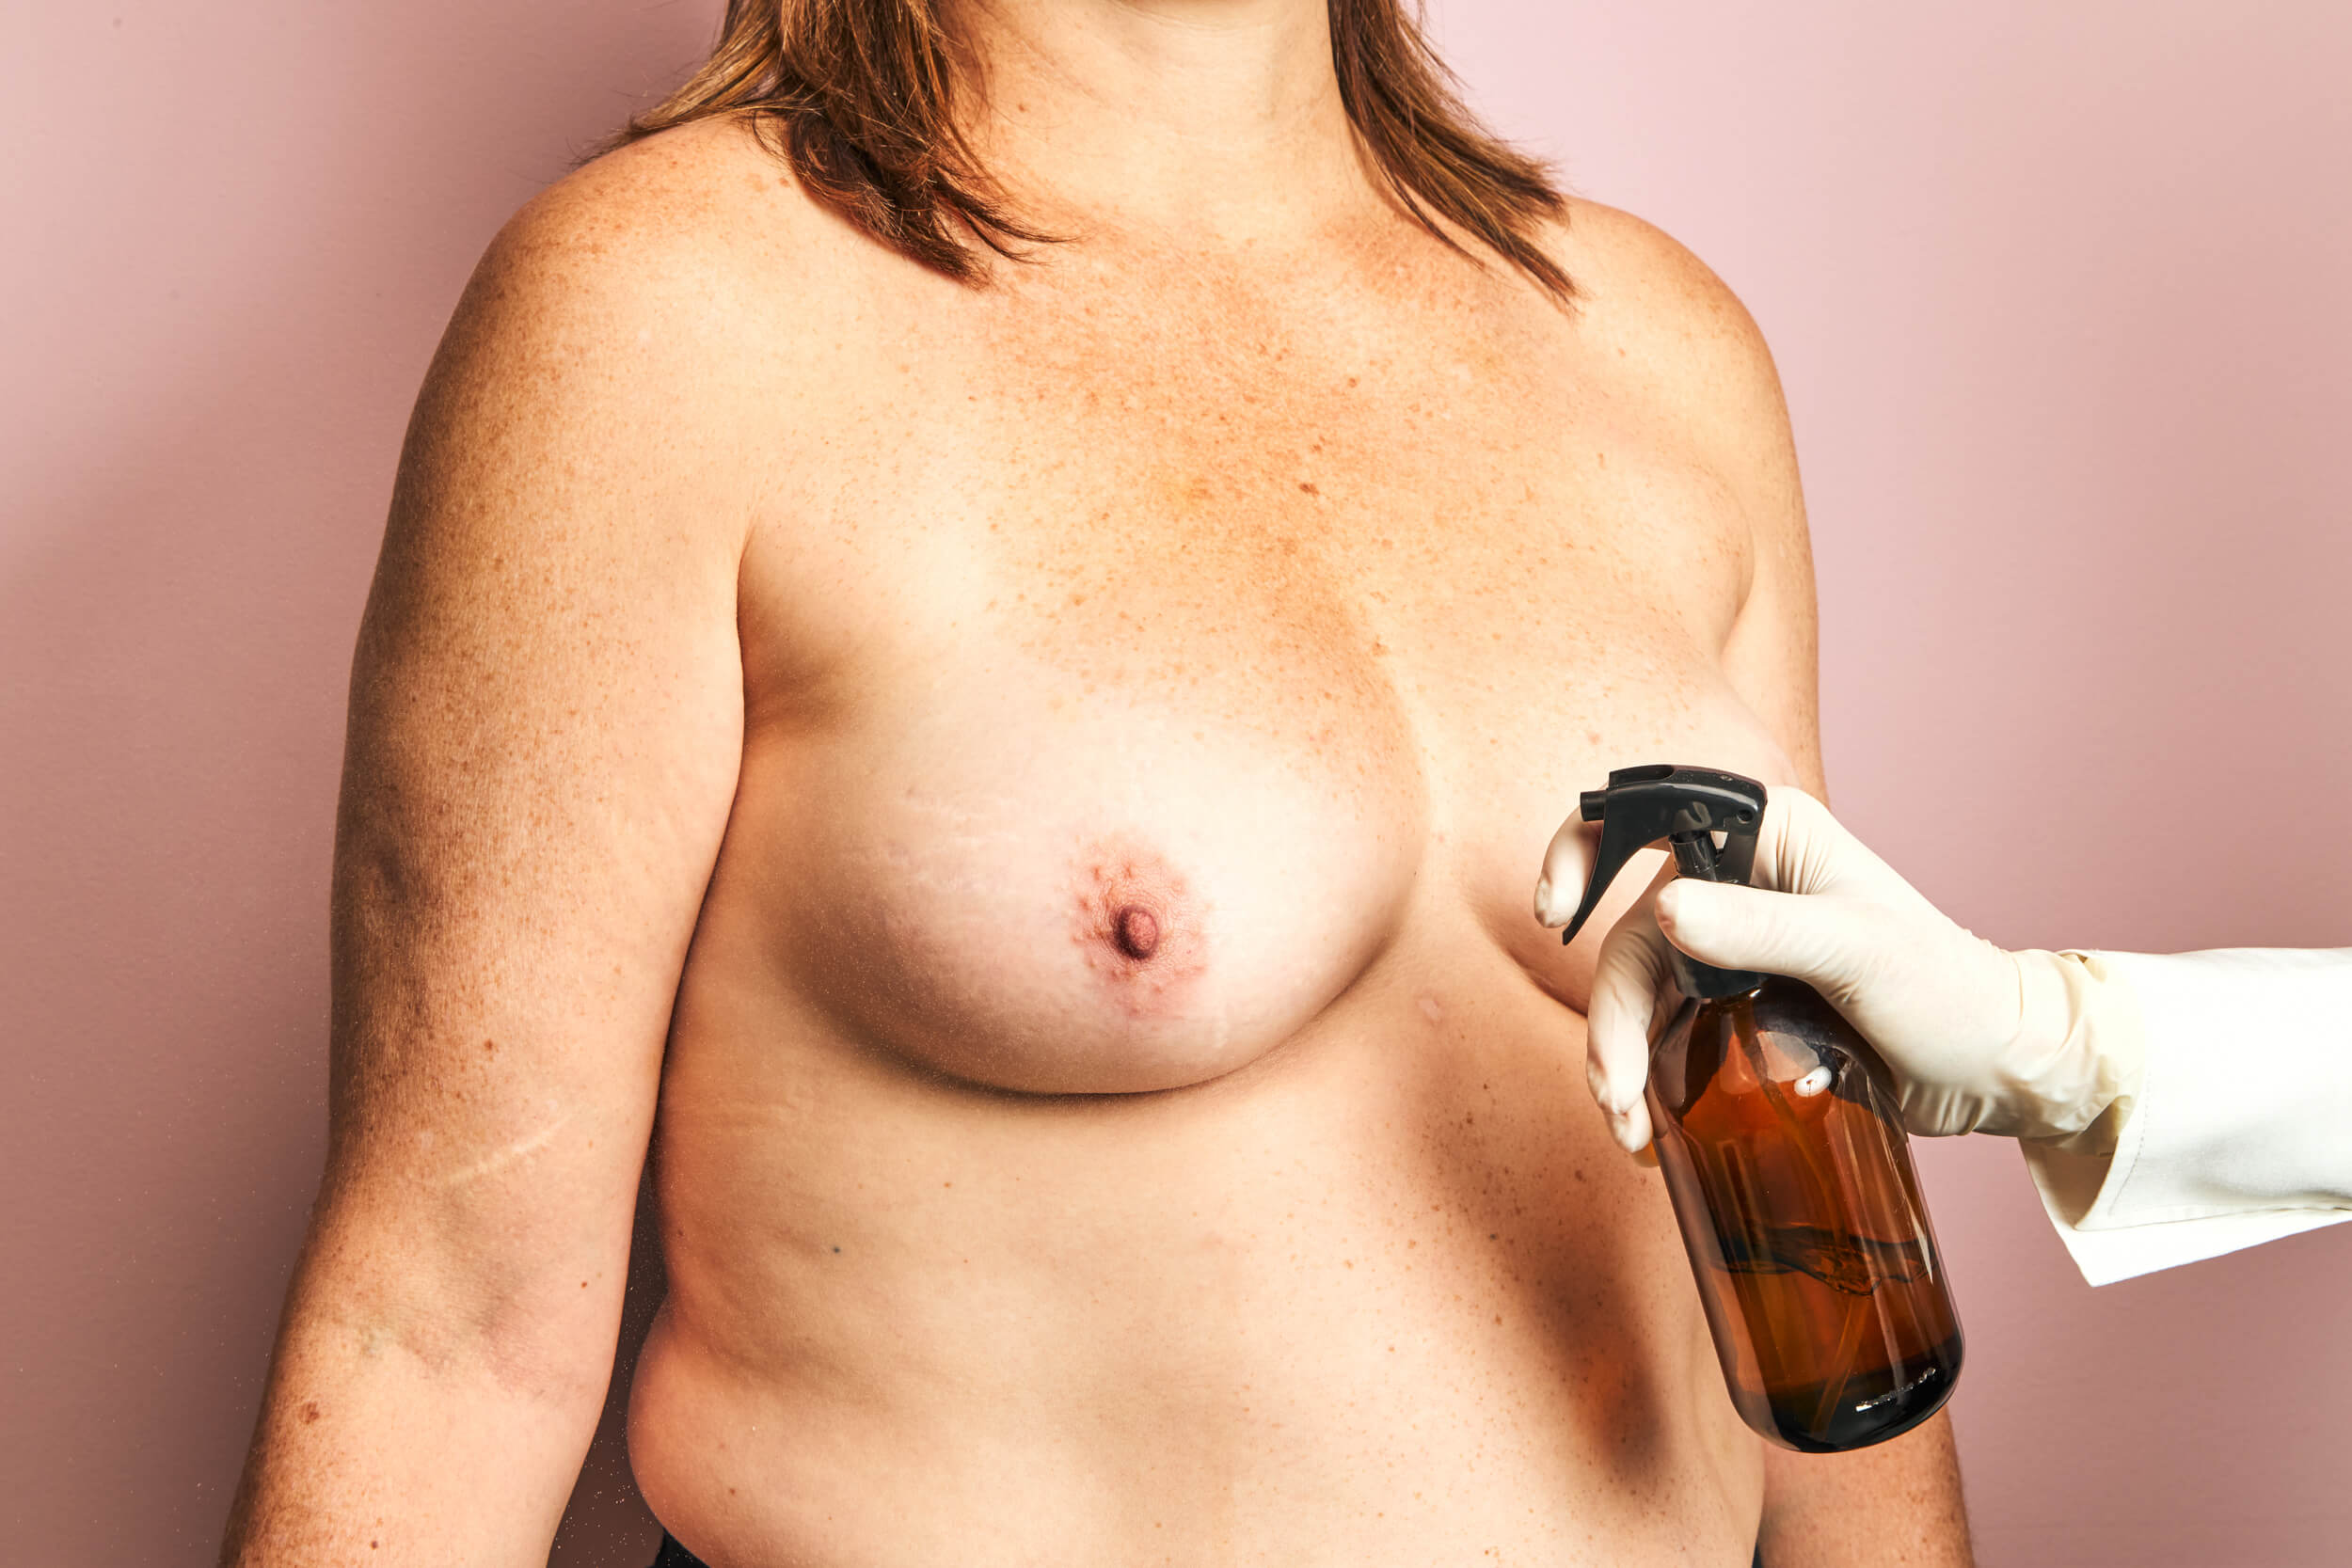
Clean and Repeat
After molding, clean the area with neutral soap or alcohol and dry well.
• For unilateral cases, repeat using the remaining material and new spatulas.
• For bilateral cases, repeat on the opposite side.
⚠️ Important: Mold one side at a time. Doing both may cause movement and affect the shape.

Step12
Fill Out the Form
Use the form below to send us your Unique Kit Code, personal info, measurements, and photos.
You’ll also find a notes field to share any relevant information. Make sure to read all instructions in the section below before submitting.
Once completed, you’ll receive an email with all the information you need to return the mold.
Step13
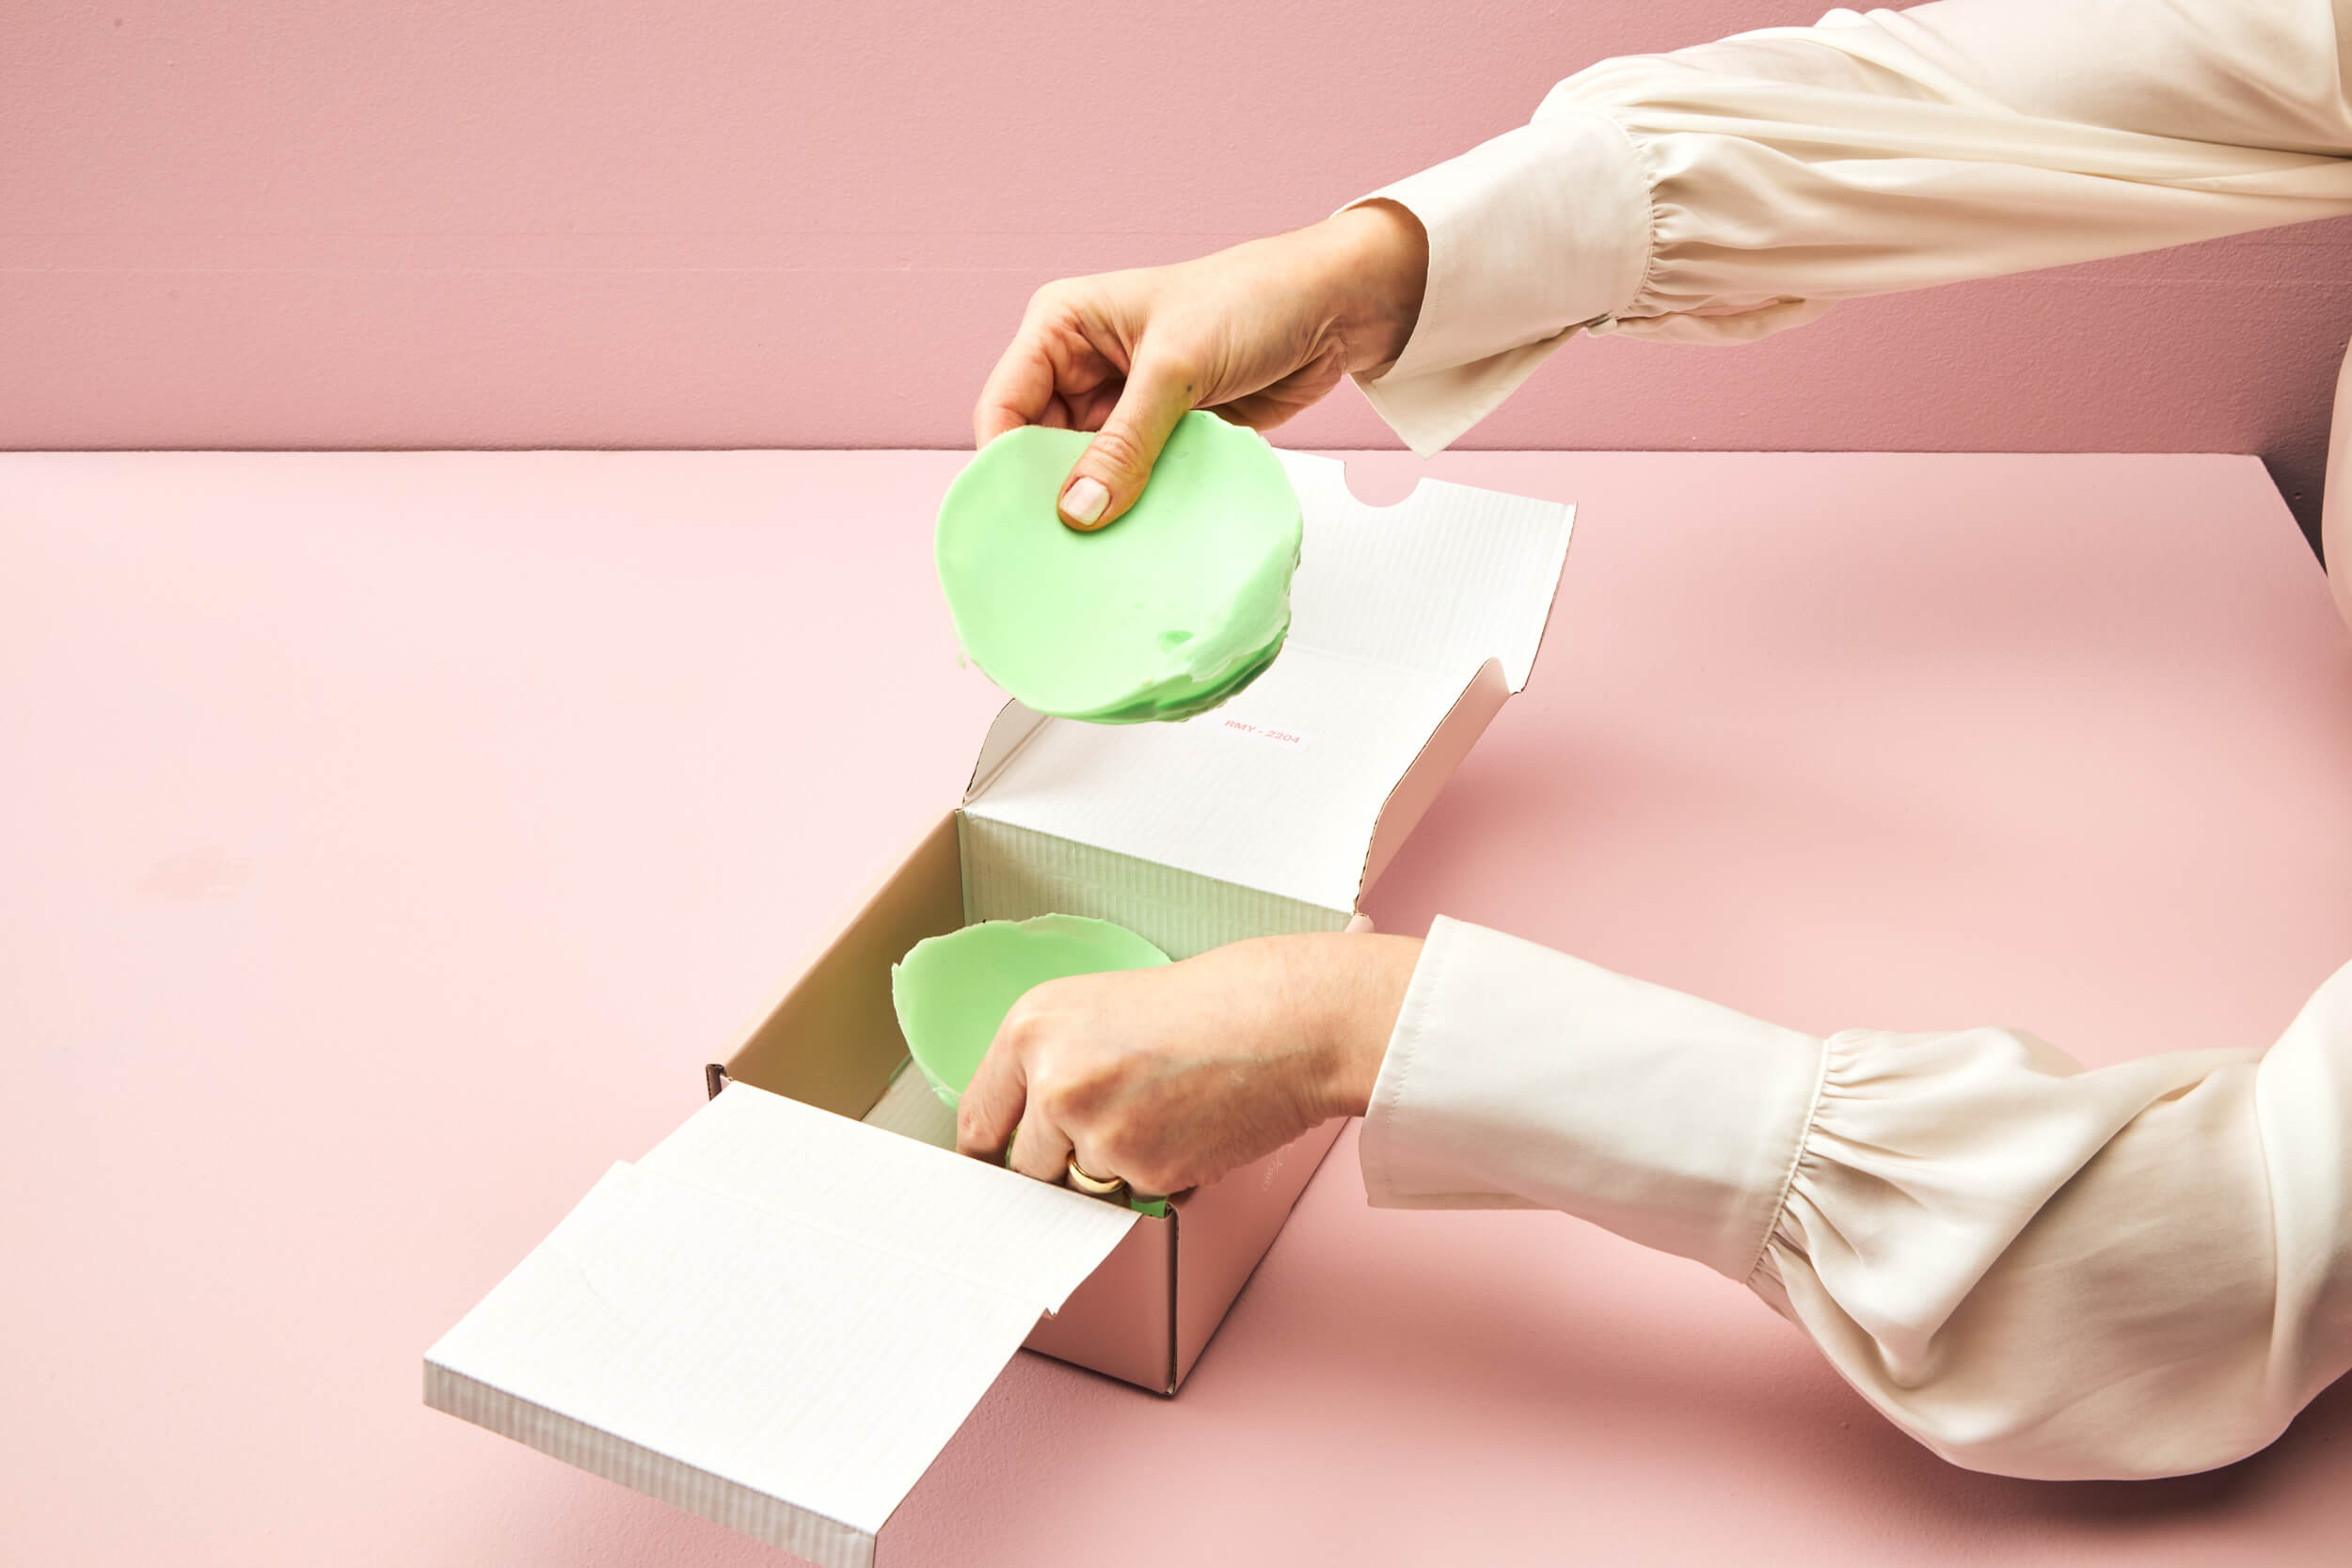
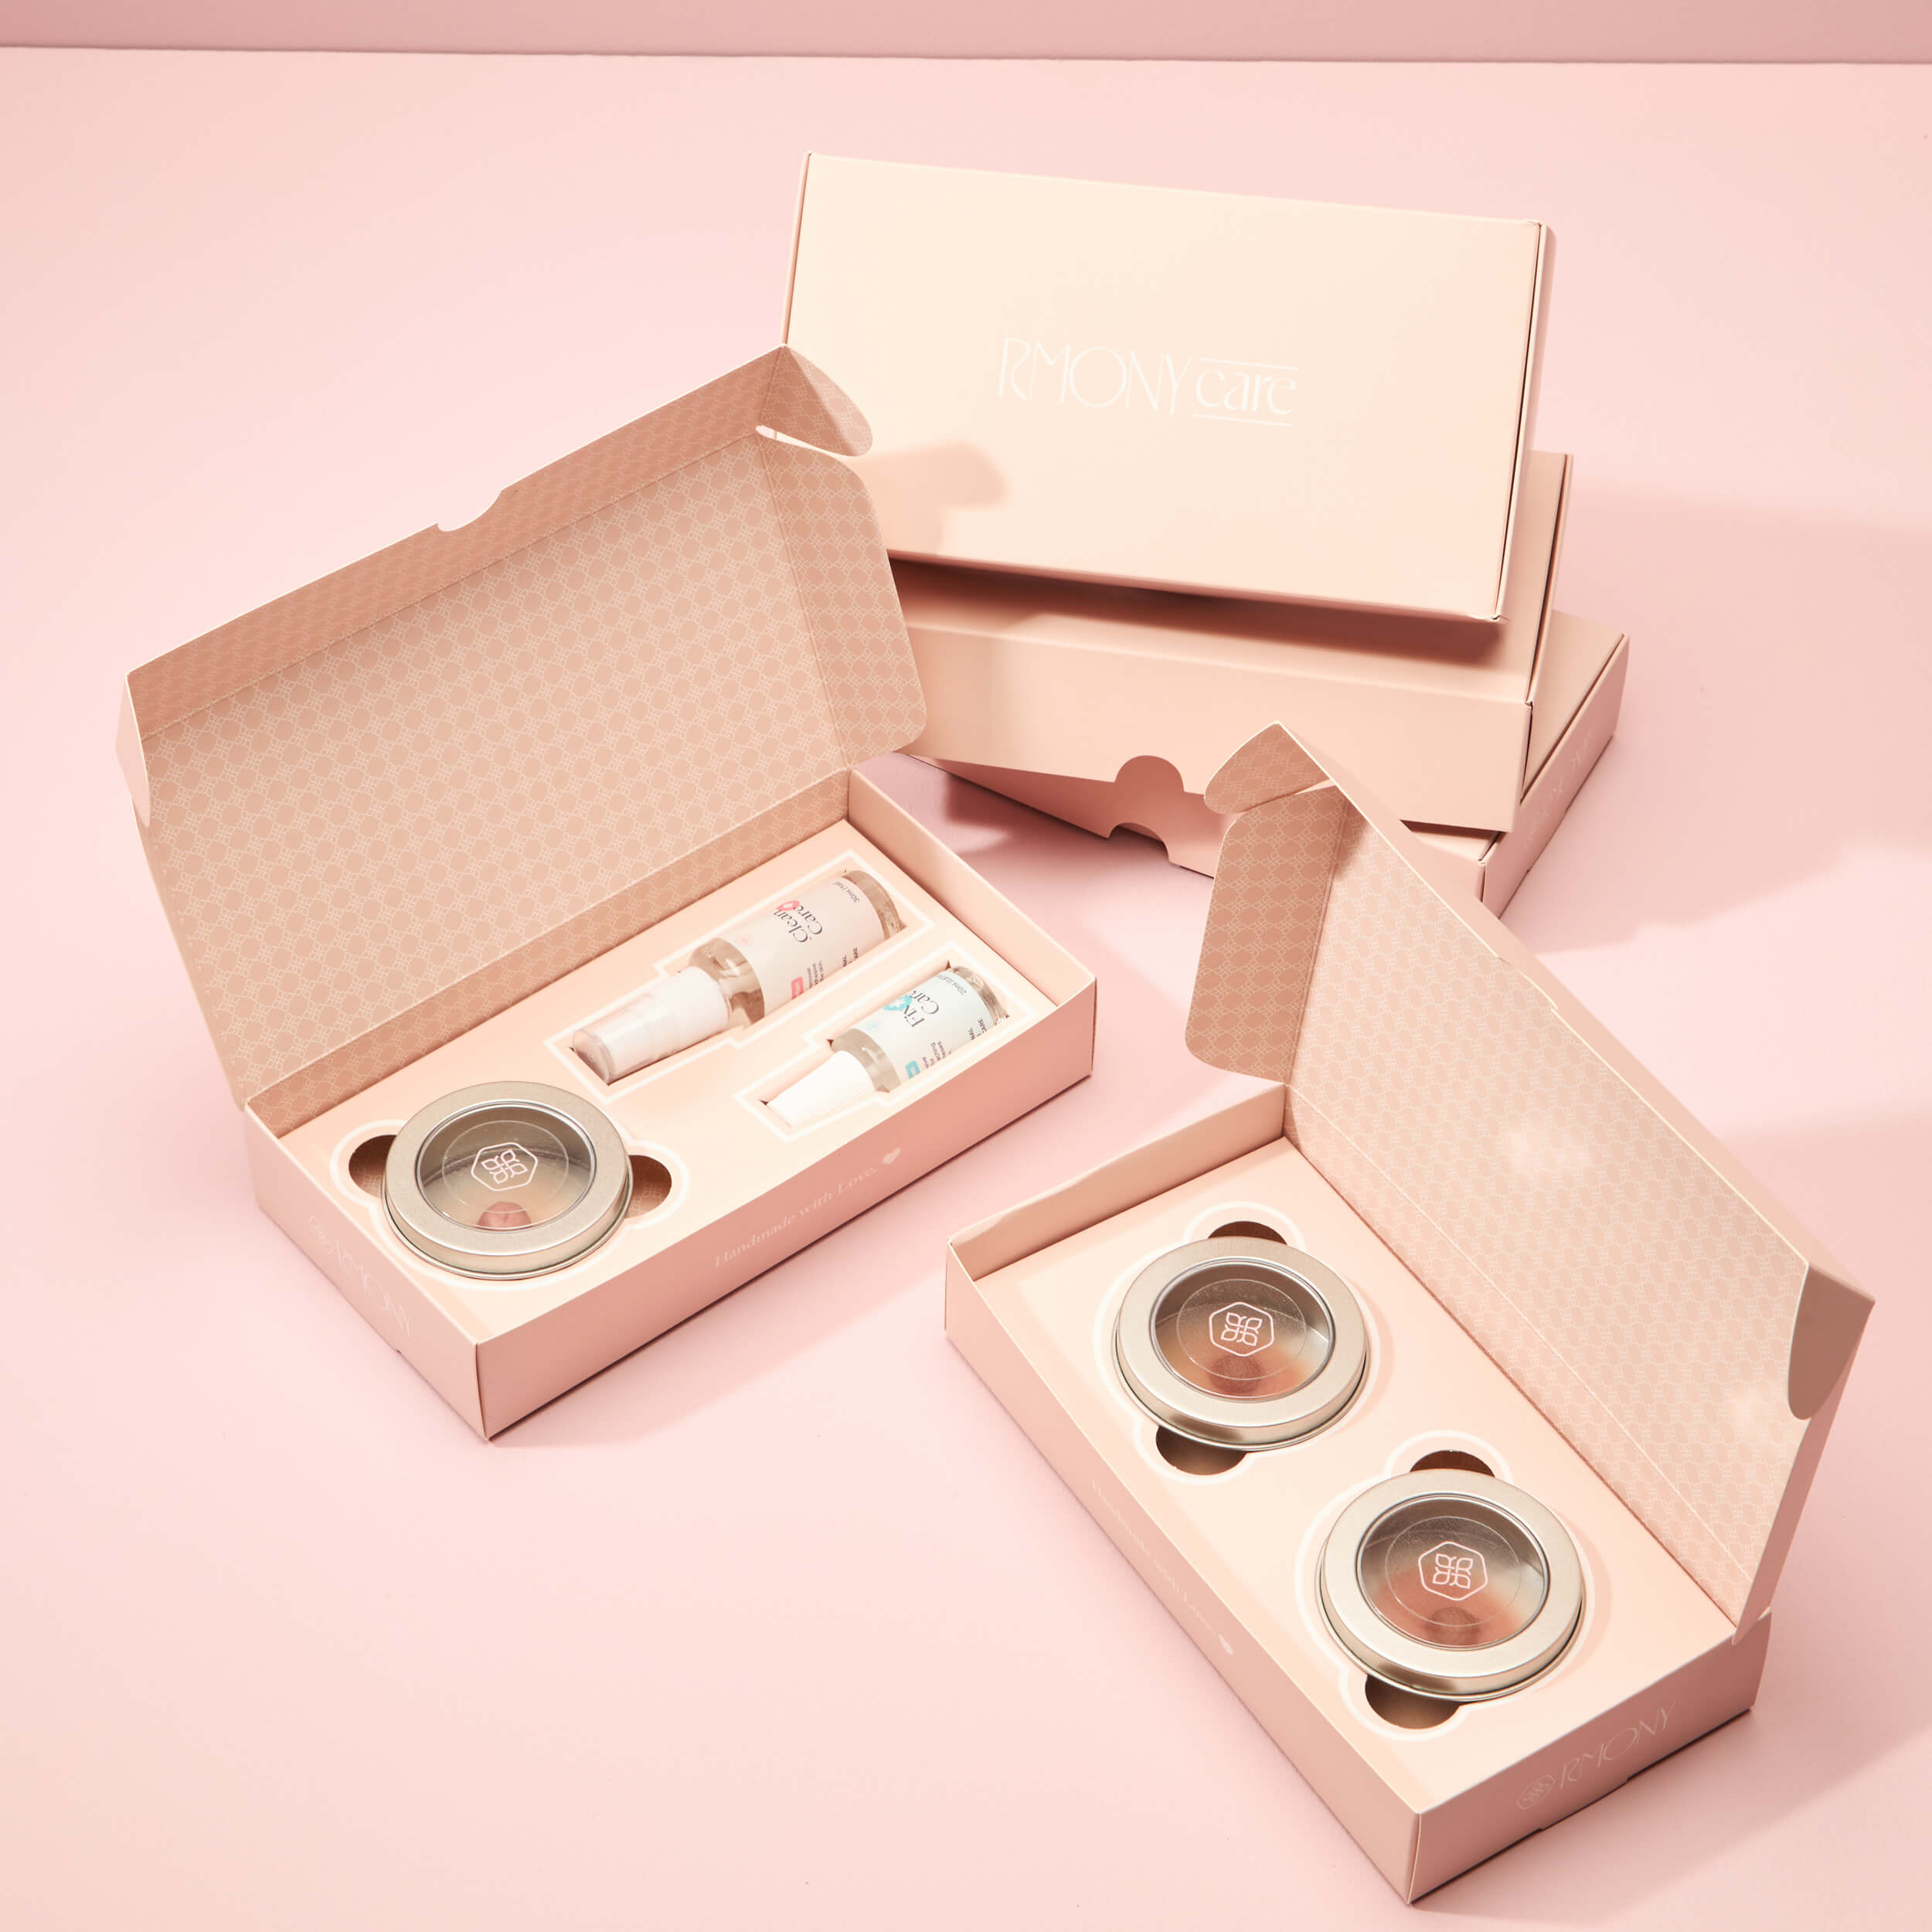
Pack and Return the Mold
Remove all items from the box, including the cardboard holder. Place both molds inside and keep the Unique Kit Code sticker on the lid — it's how we track your kit.
Seal the box well with tape to avoid damage or humidity.
Return your mold and the kit according to the email instructions.
Final Step: Submit Your Form
⚠️ This STEP IS ONLY FOR CLIENTS who have purchased the Pre-Surgery Kit or Online Signature Prostheses
Submission Checklist
⚠️ This step should only be completed after you’ve finished taking your mold and followed all the steps provided in the guide.
Before submitting your form, please review the checklist below. This will help us identify your kit, track its return, and connect it with your personal information for the production of your customized prosthesis.
What you’ll need to provide:
- Unique Kit Code (found inside your box).
- Full name, email, and contact details.
- Areola required photos.
- Selected color and measurements.
- Any additional notes you find relevant.
Fill Out the Form
⚠️ We recommend filling out the form on your phone using the QR code — it’s easier to upload your photos directly from your gallery.
Don’t worry — the form will guide you with clear instructions at each step. After submission, you’ll receive an email with instructions on how to return the kit.
To proceed, scan the QR code in the image provided or tap the link below.
Two Paths, One Purpose
Choose the Best Option for You
Whether you want full control at home or prefer professional assistance, we offer both ways to take your mold — always safe, precise, and designed for your comfort.

Online | Take your Mold at Home
Get our Rmony Impression Kit delivered to your door with everything you need to take your mold in privacy and comfort — anytime, anywhere.
In-Person | Schedule with a Specialist
Prefer someone to take the mold for you? Book a session with a licensed Rmony partner trained to guide you through the process with precision.
Still Have Questions?
We’re here to support you every step of the way. If anything feels unclear, don’t hesitate to reach out.
RmonyCare Collections
Begin Your Journey with RmonyCare
Explore our handcrafted collections, designed to restore confidence, beauty, and comfort through every stage of healing.
FAQs
Common questions about daily use and care.
Is the mold recommended before surgery?
Yes. This is one of our most meaningful goals. Taking the mold before surgery allows you to preserve the unique characteristics of your areola with care and intention.
It’s a way of protecting your identity and giving yourself the option to replicate what’s yours — even after a physical transformation.
This step is often overlooked, but it makes all the difference in creating a prosthesis that truly feels personal, authentic, and connected to your story.
Can I take the mold by myself at home?
Yes. The Pre-Surgey Kit was designed for you to take the mold at home, safely and comfortably. Follow the step-by-step guide included in your kit or on this page.
What if I don’t feel confident doing it alone?
No problem. In-person consultations are currently available in São Paulo (Brazil) and Miami (USA). We are working on an international expansion project, and soon you’ll be able to take your impression with certified specialists and partner locations in several countries around the world.
What is included in the Pre-Surgey Kit?
The kit includes:
- 2 containers: Shape Pro A and Shape Pro B
- 4 wooden spatulas
- 1 Fit Ruler
- 1 Color ID
- Instruction card with a questionnaire
- Return label and shipping instructions
How long does it take to complete the mold?
The full process takes around 30 minutes to complete two impressions, including preparation, mixing, application, drying time, and packaging.
How do I know if the mold is dry enough to remove?
It’s ready when it no longer sticks to your fingers, even if it still looks shiny. This usually takes 12 to 15 minutes.
What if I make a mistake or the mold doesn’t work?
We strongly recommend that you watch the complete tutorial video and carefully read the step-by-step guide on this page before starting the process.
After watching and reading the instructions, if you still experience difficulties, feel free to contact our support team for assistance.
Can I take a mold if I’ve already had surgery?
Yes. If your case is unilateral and one areola is still present, you can take a mold as a reference to replicate it on the other side.
If the surgery was bilateral and neither side remains, we recommend choosing one of our Pre-Designed Collections, which include a wide variety of colors, sizes, shapes, and styles — ready to wear and beautifully crafted.
How do I choose the correct areola color?
Use the Color ID provided in your kit. Place both sides over your areola and take a clear photo in ambient temperature. This helps us match your tone as closely as possible.
Why is temperature important during the process?
Low or high temperatures can cause contraction or expansion of the areola, affecting its size and color.
Keep the room around 23°C (73°F) and warm the skin gently before taking measurements or photos. To do this, simply place your hand over the areola and press gently for about 15 seconds to help stabilize the temperature and prevent changes in size.
Should I measure before or after applying the mold?
Always measure and photograph your areola before applying the molding material, using the Fit Ruler.
Write down the measurements on the questionnaire provided.
How many molds should I make?
We recommend making two molds in all cases:
- For unilateral cases, take two impressions of the same areola
- For bilateral cases, take one impression of each side
The kit contains enough material to create two full molds comfortably, with a small margin of extra material.
How do I ship the mold back?
Complete the online form following the instructions on your card. After submission, you’ll receive your return label via email.
Place both dried molds inside the original box, seal it securely with tape, and attach the prepaid return label.
Drop off your box at the nearest location indicated.
Is the material safe for my skin?
Yes. Both Shape Pro A and Shape Pro B are biocompatible for human skin and safe when used as directed.
How do I store the materials before use?
Keep Shape Pro A and B in a clean, dry place at 22–24°C (72–75°F) for at least 4 hours before starting the process.